1. Set up project resolution
The first step is to set the project resolution of the scene to match the resolution of the Looking Glass screen. For this tutoria,l I am using a Looking Glass Portrait which has a resolution of 1536 (width) and 2048 (height) So go to Windows> Rendering Editors> Render Settings.
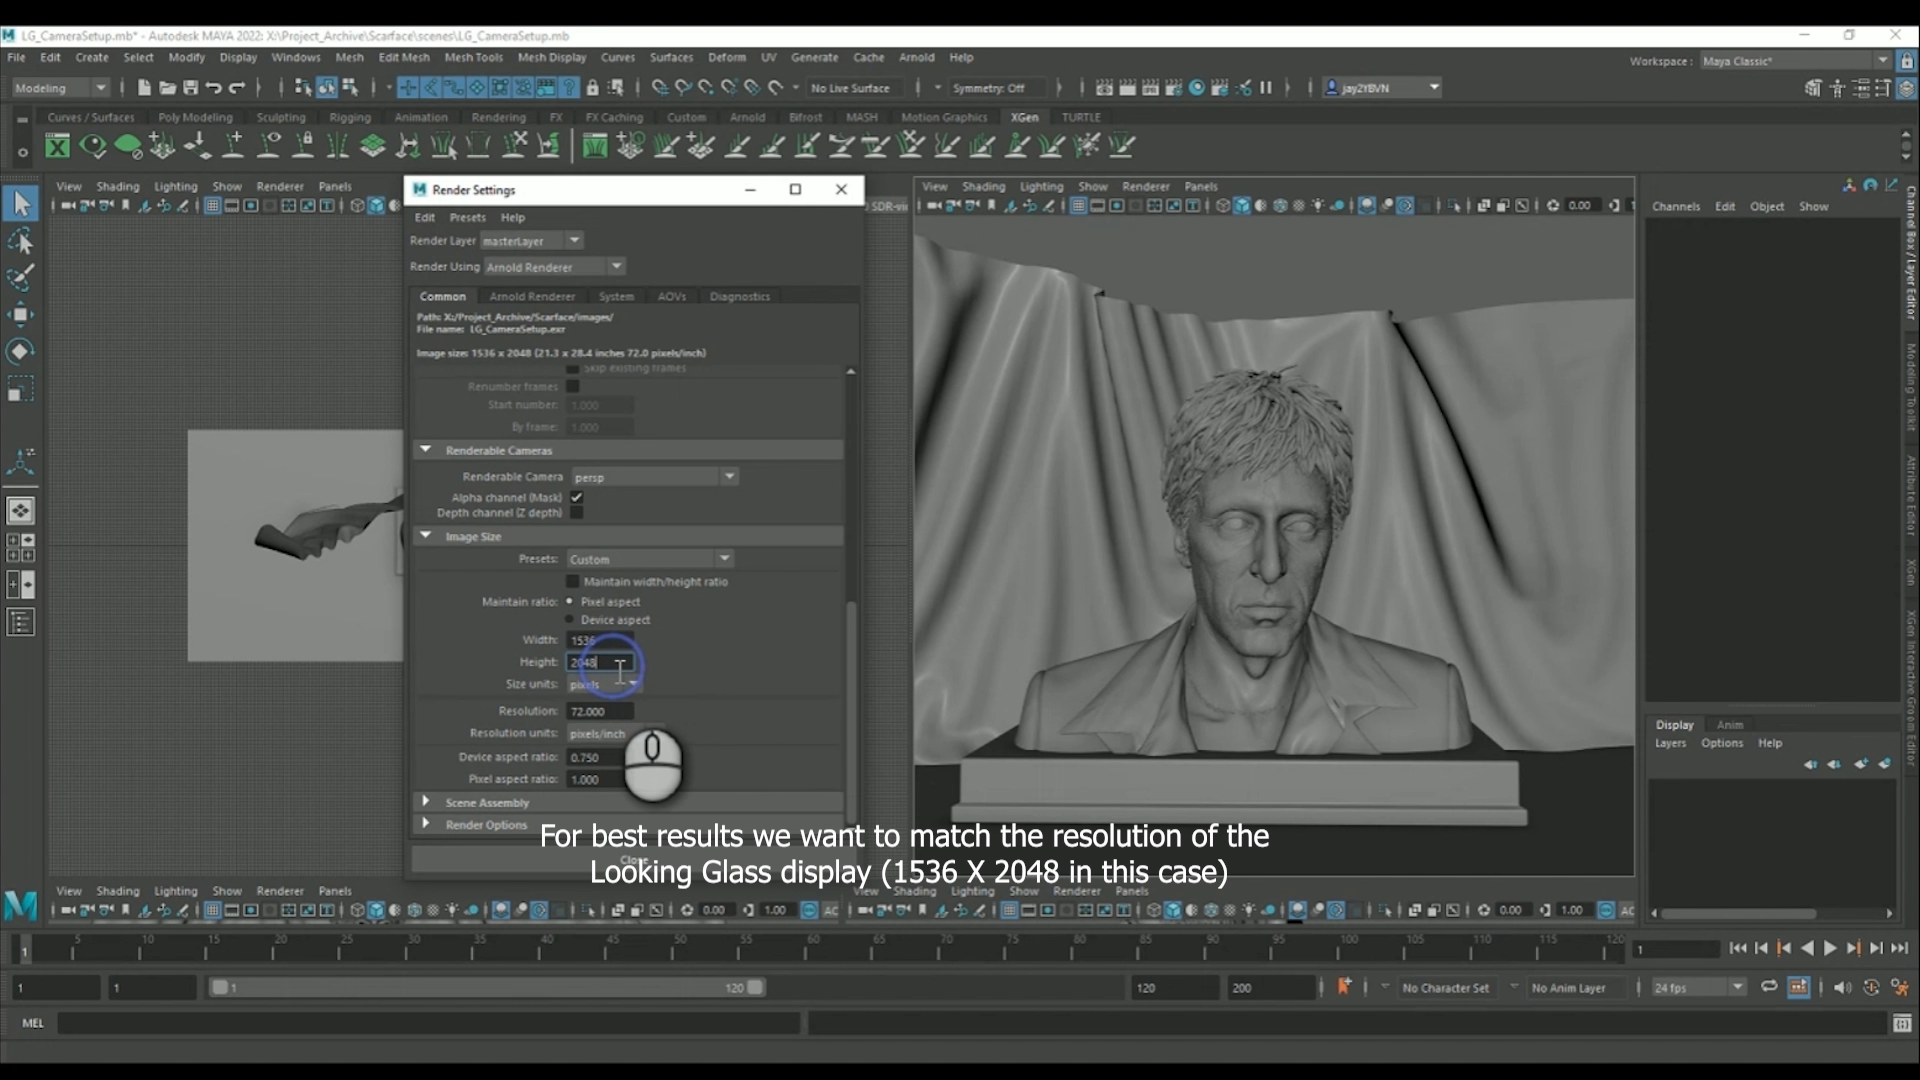
Make sure the renderer is set to the one you want to use (In this case, Arnold) then scroll down to Image Size and set width and height as required.
2. Set up a Looking Glass Camera
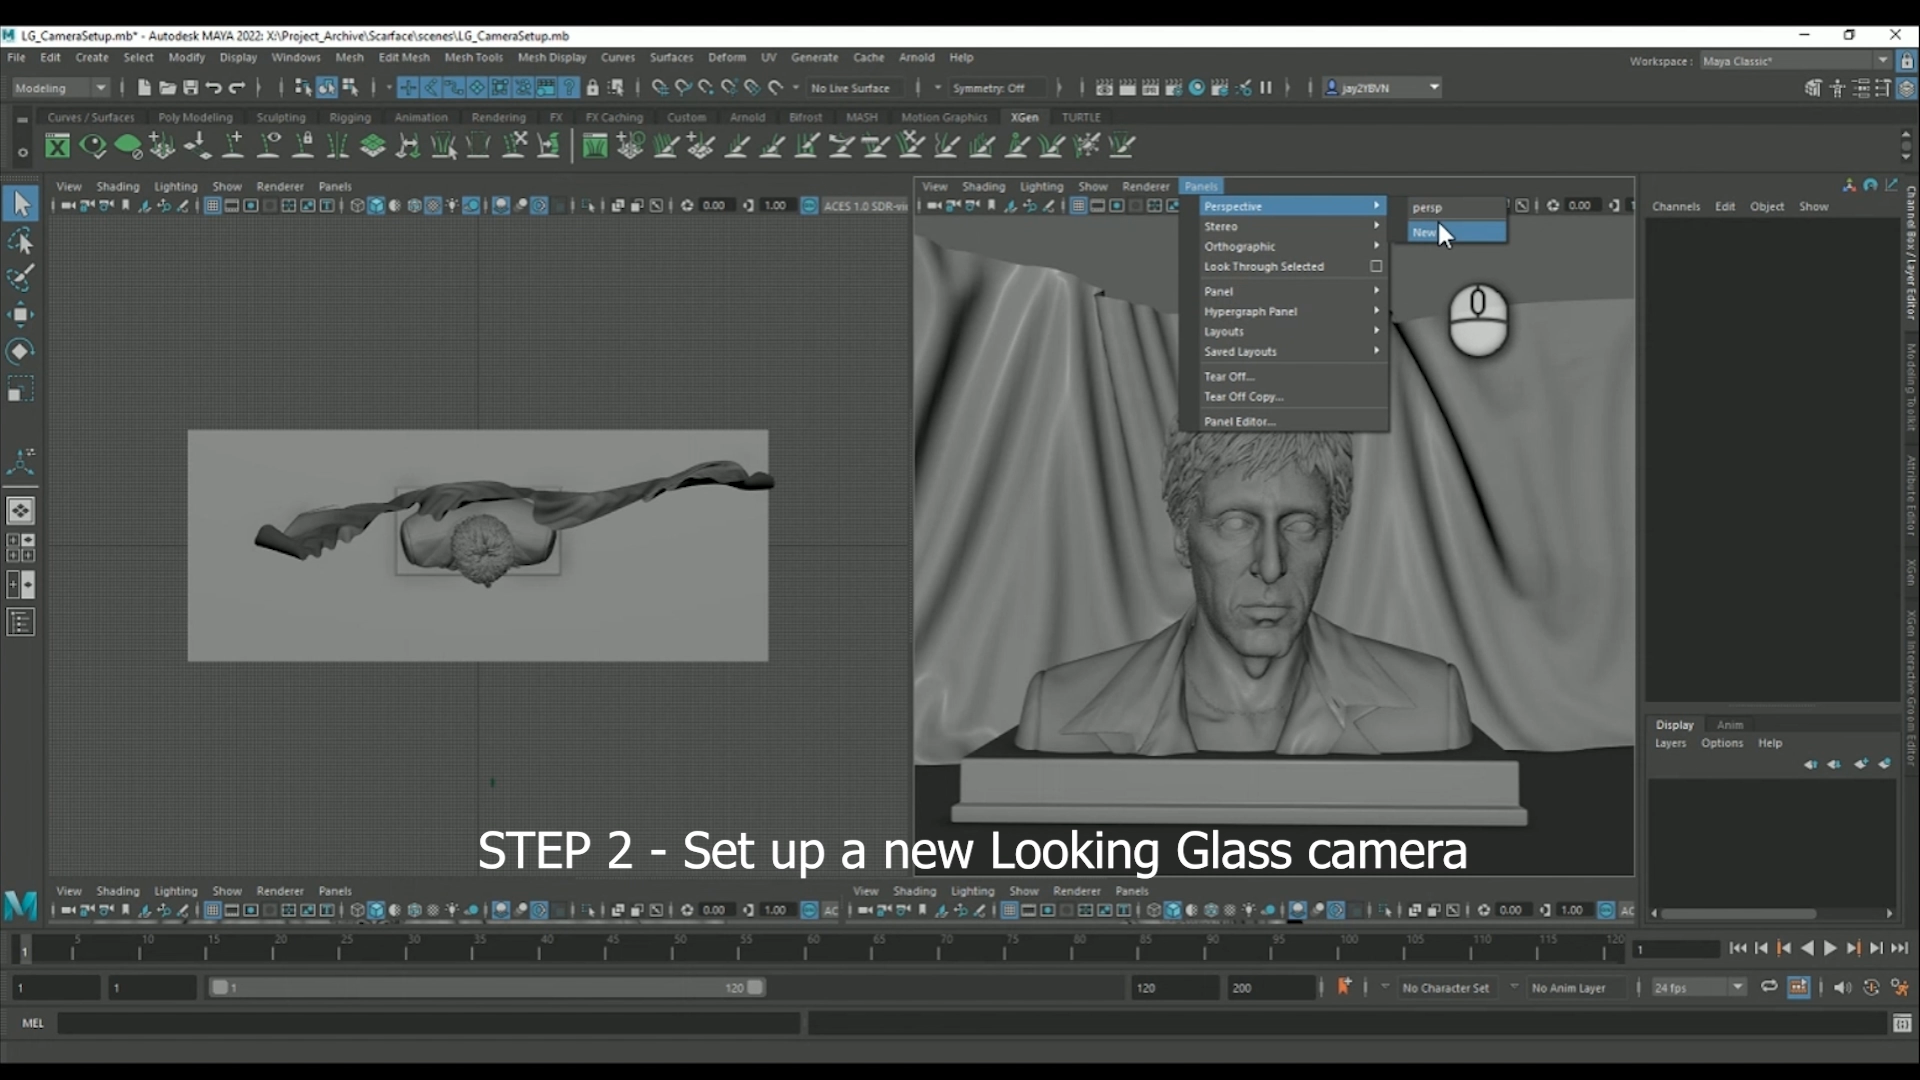
In the viewport, go to Panels> camera> New to create a new camera. Maya will automatically switch to look through the newly created camera. It’s a good idea to rename this camera to something appropriate (eg. LG_CAMERA)
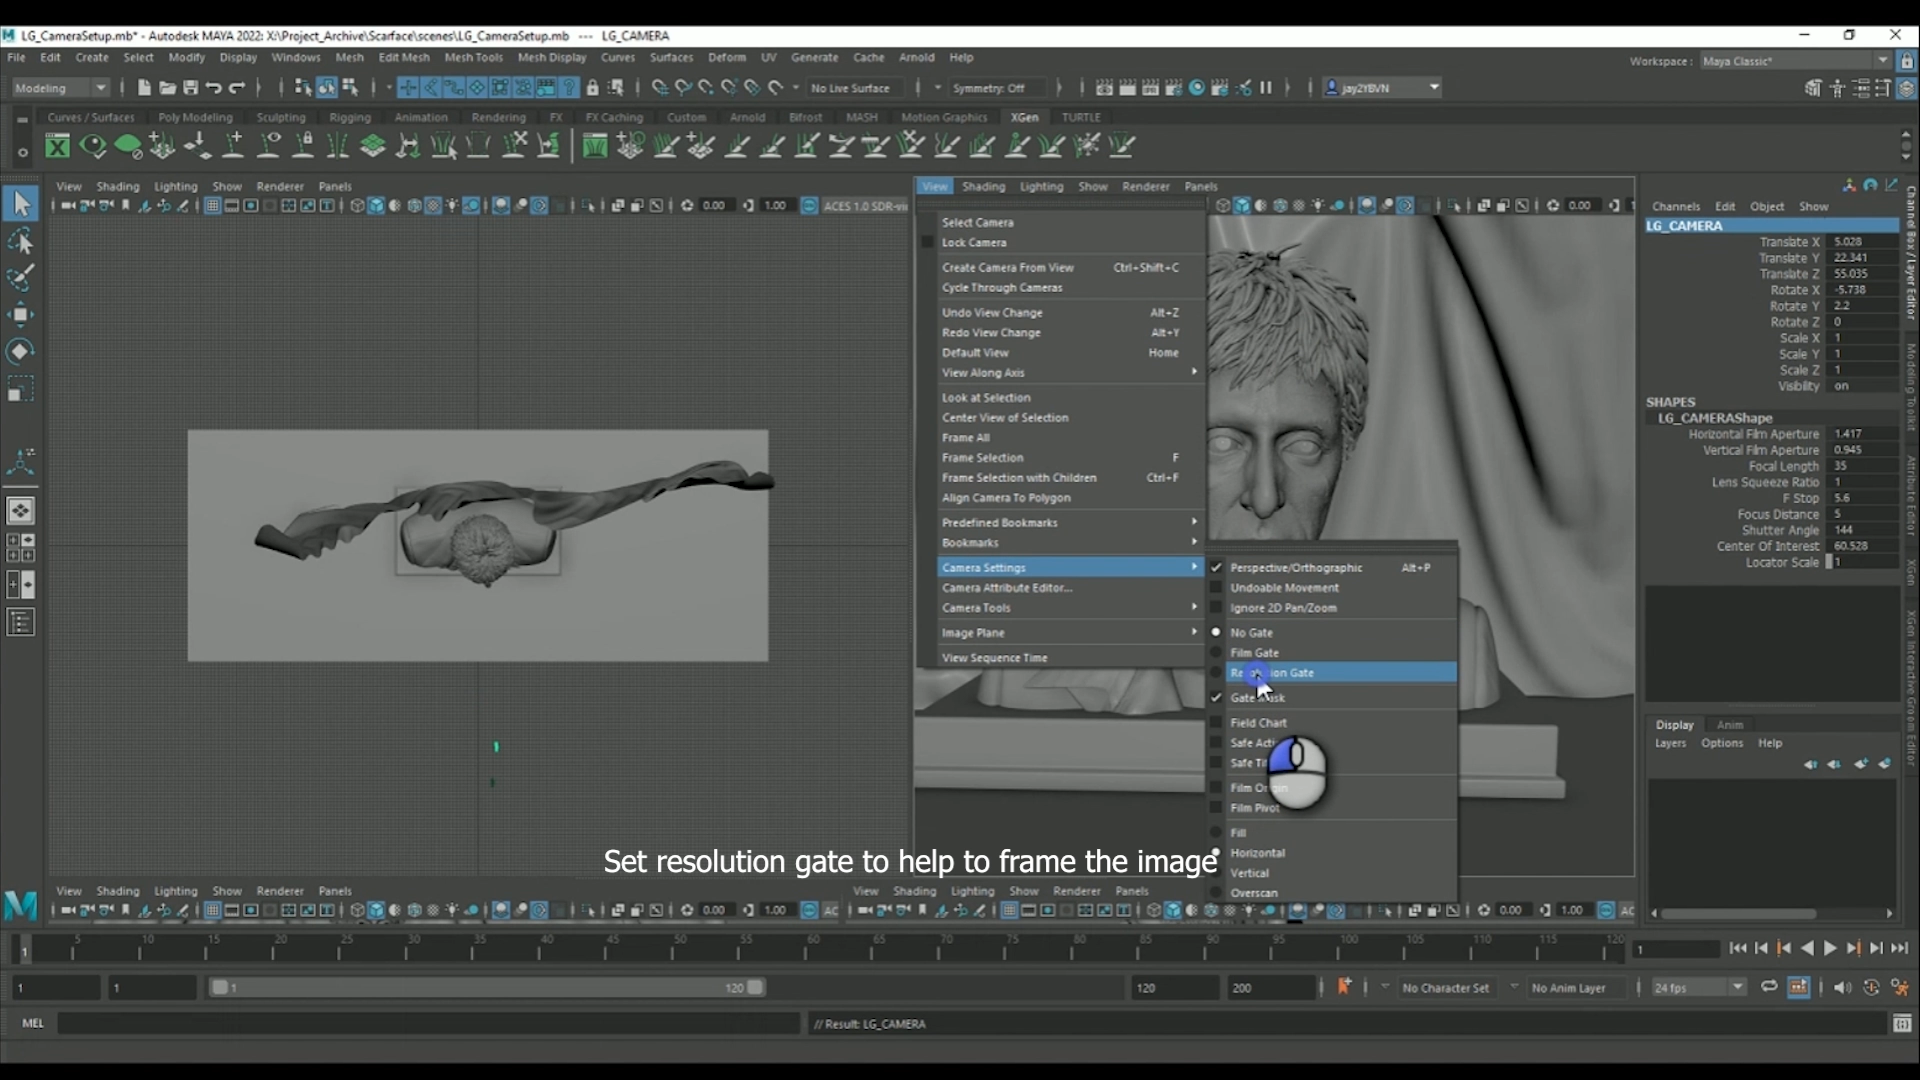
Next, in the viewport, go to View> Camera Settings> Resolution Gate. This creates a border in the viewport representing what the rendered frame will be.
Then in the camera’s Channel box, make sure the camera Rotate X, Y and Z values are set to 0, and the camera Translate X is also set to 0.
For this tutorial, I’ve made sure the reference model is placed in the middle of the scene so that the camera can be set up with no rotation in any axis. (The camera can be moved or rotated anywhere later, but this just keeps things simpler when setting it up.)
Next in the viewport go to View> Select Camera and press Ctrl + a on your keyboard to open the camera attributes.
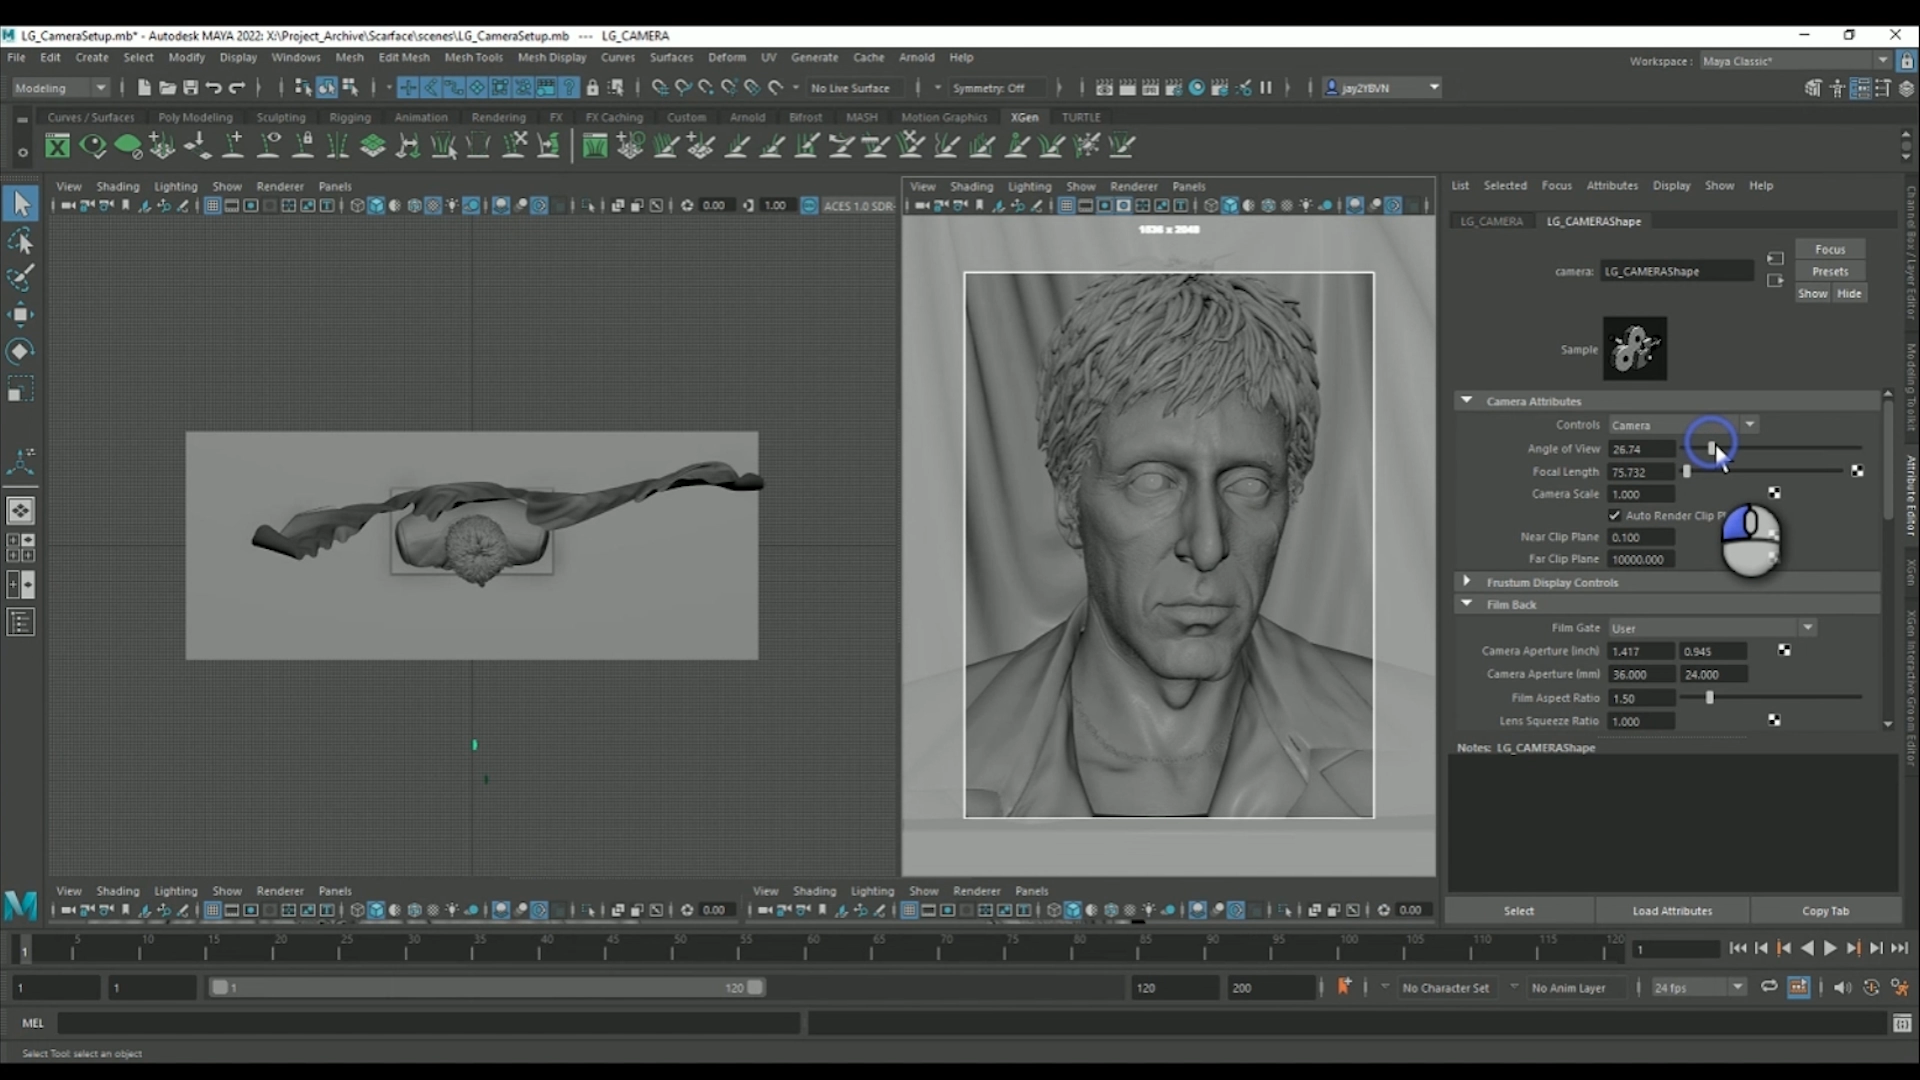
From here change the angle of view/focal length and move the camera backwards, forwards, up and down until the scene is framed nicely. I find for portraits a Focal length between 80 to 100 works well.
Make sure you don’t rotate the camera at this stage- it must be pointing straight ahead.
If the scene is not centered properly in the X Axis, make sure the camera's X Translation is still set to 0 and adjust the models in the reference scene to fit, rather than moving the camera. Once in position, don’t touch this camera again until later – for the next section use the default Perspective camera to navigate around the scene.
3. Creating guide geometry for the camera
To help getting the right amount of movement in the camera, we need to create some guide geometry to help.
The first step is to create a polygonal cylinder, and set the divisions to 8, so that each segment of the cylinder is a 45-degree arc.
Rotate the cylinder in the X Axis by 22.5 degrees so the segment is lined up to the camera, and go to Modify> Freeze Transformations.
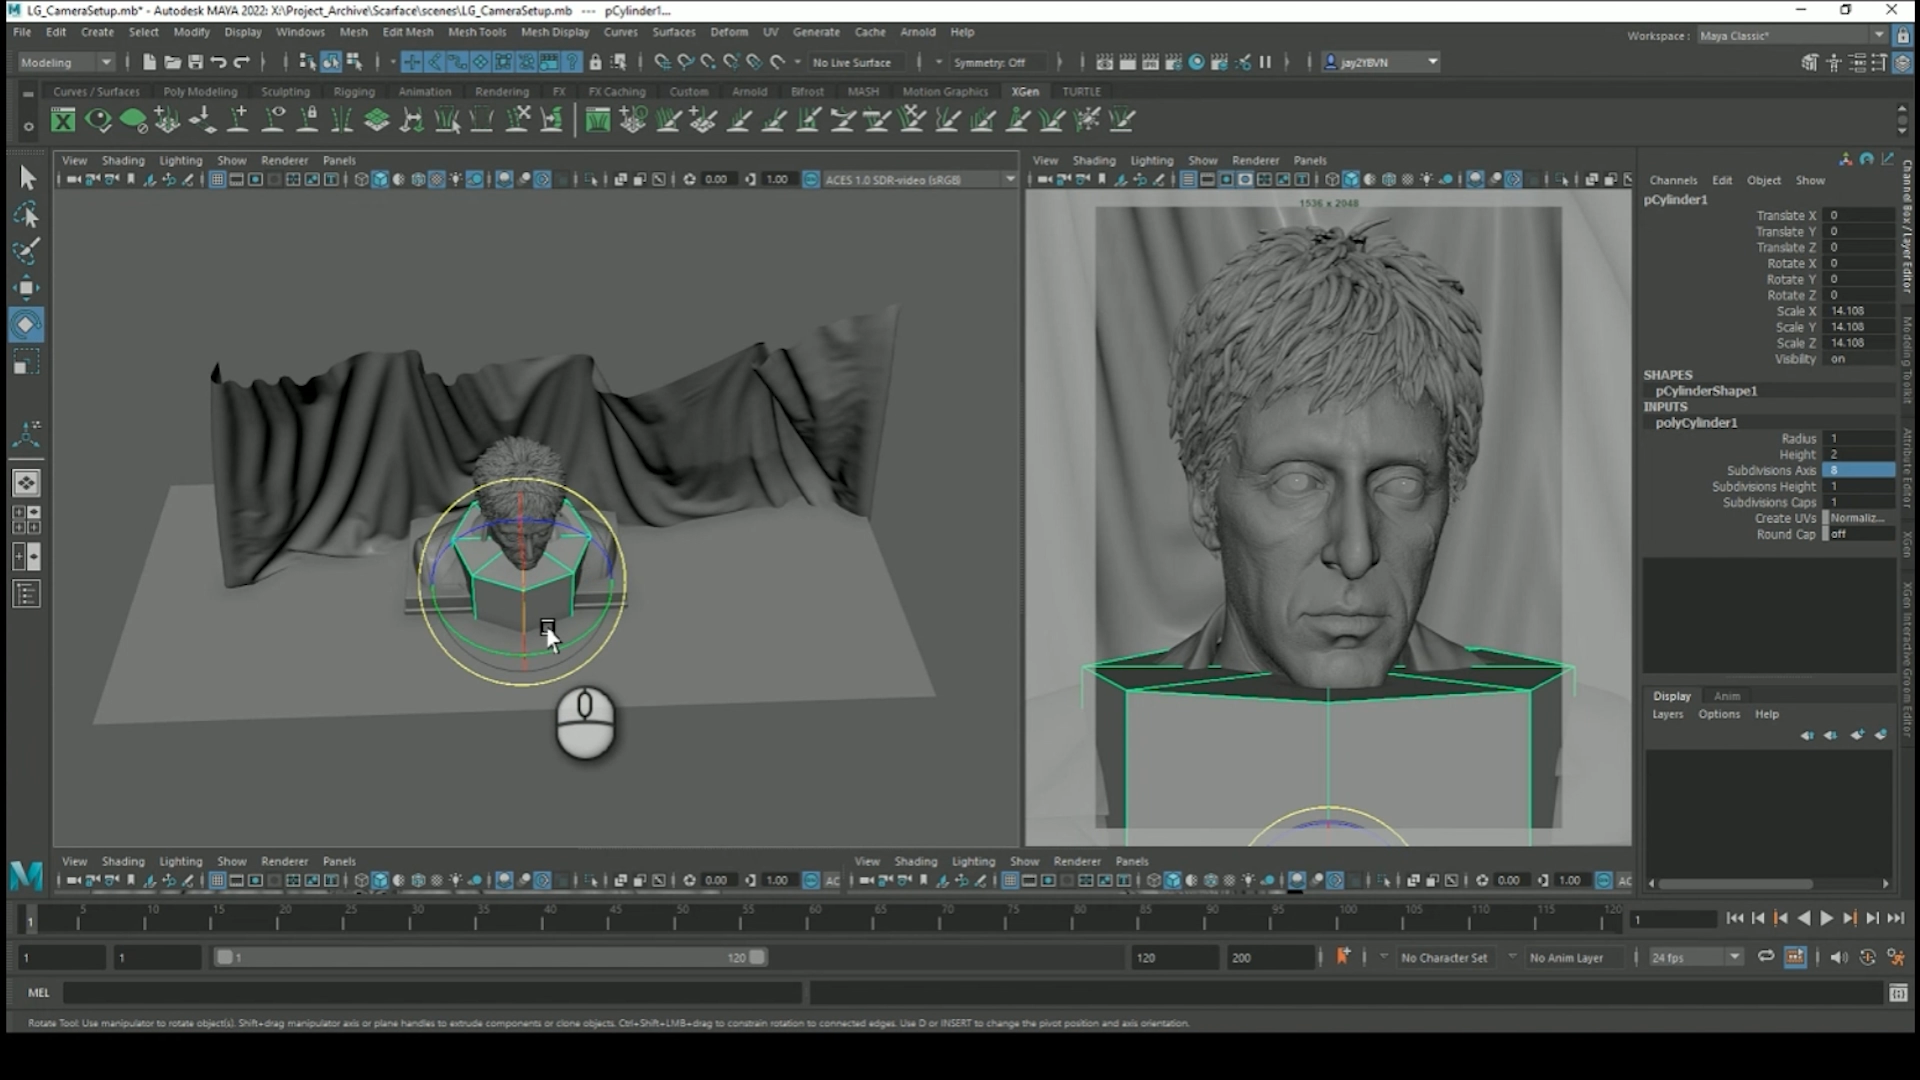
Next, delete all the unneeded faces so you are left with a single polygon from the top of the cylinder.
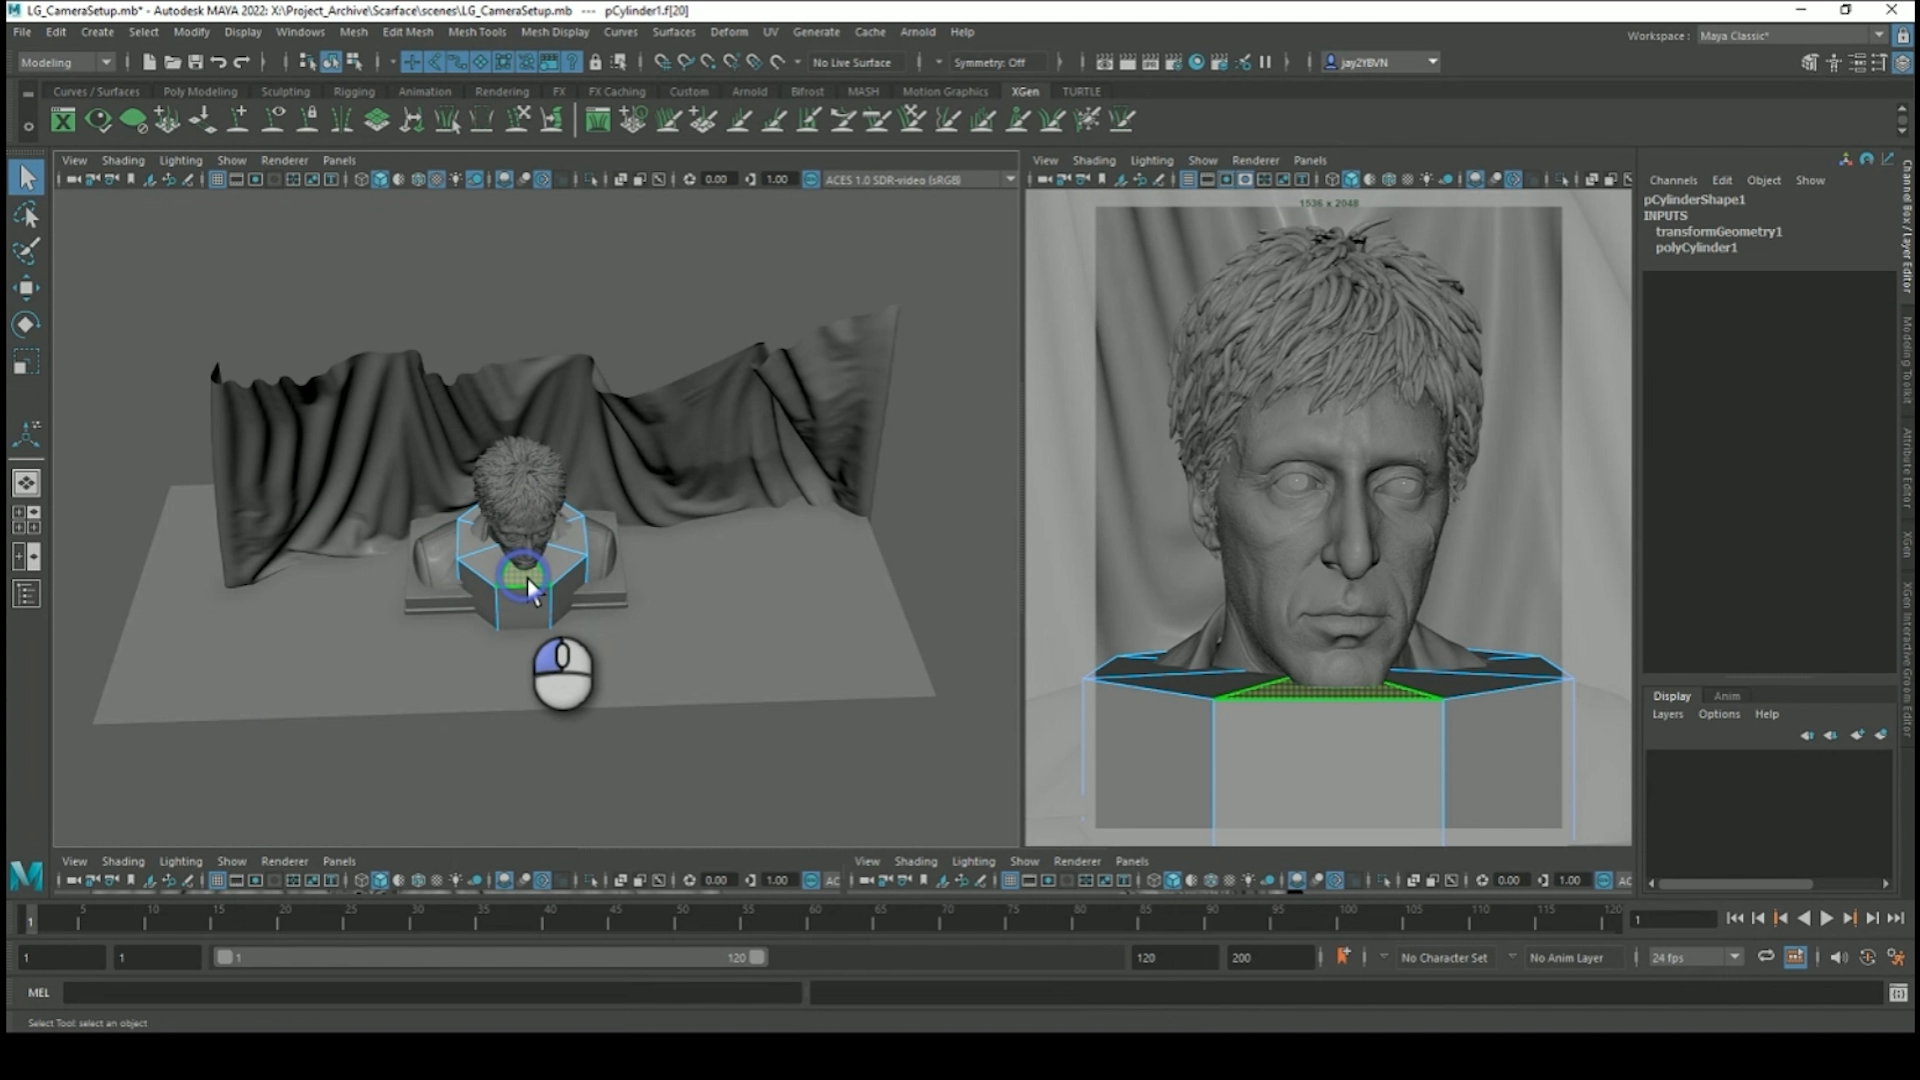
Then set the pivot of this polygon by pressing Insert then holding V and snapping the pivot to the vertex closest to the origin, then press Insert again to stop editing the Pivot point.
Next, move the guide geometry to the same Y axis as the LG_CAMERA, and move in the Z -axis until the end point is roughly level with the character’s eyes (or whatever the focal point of your scene is).
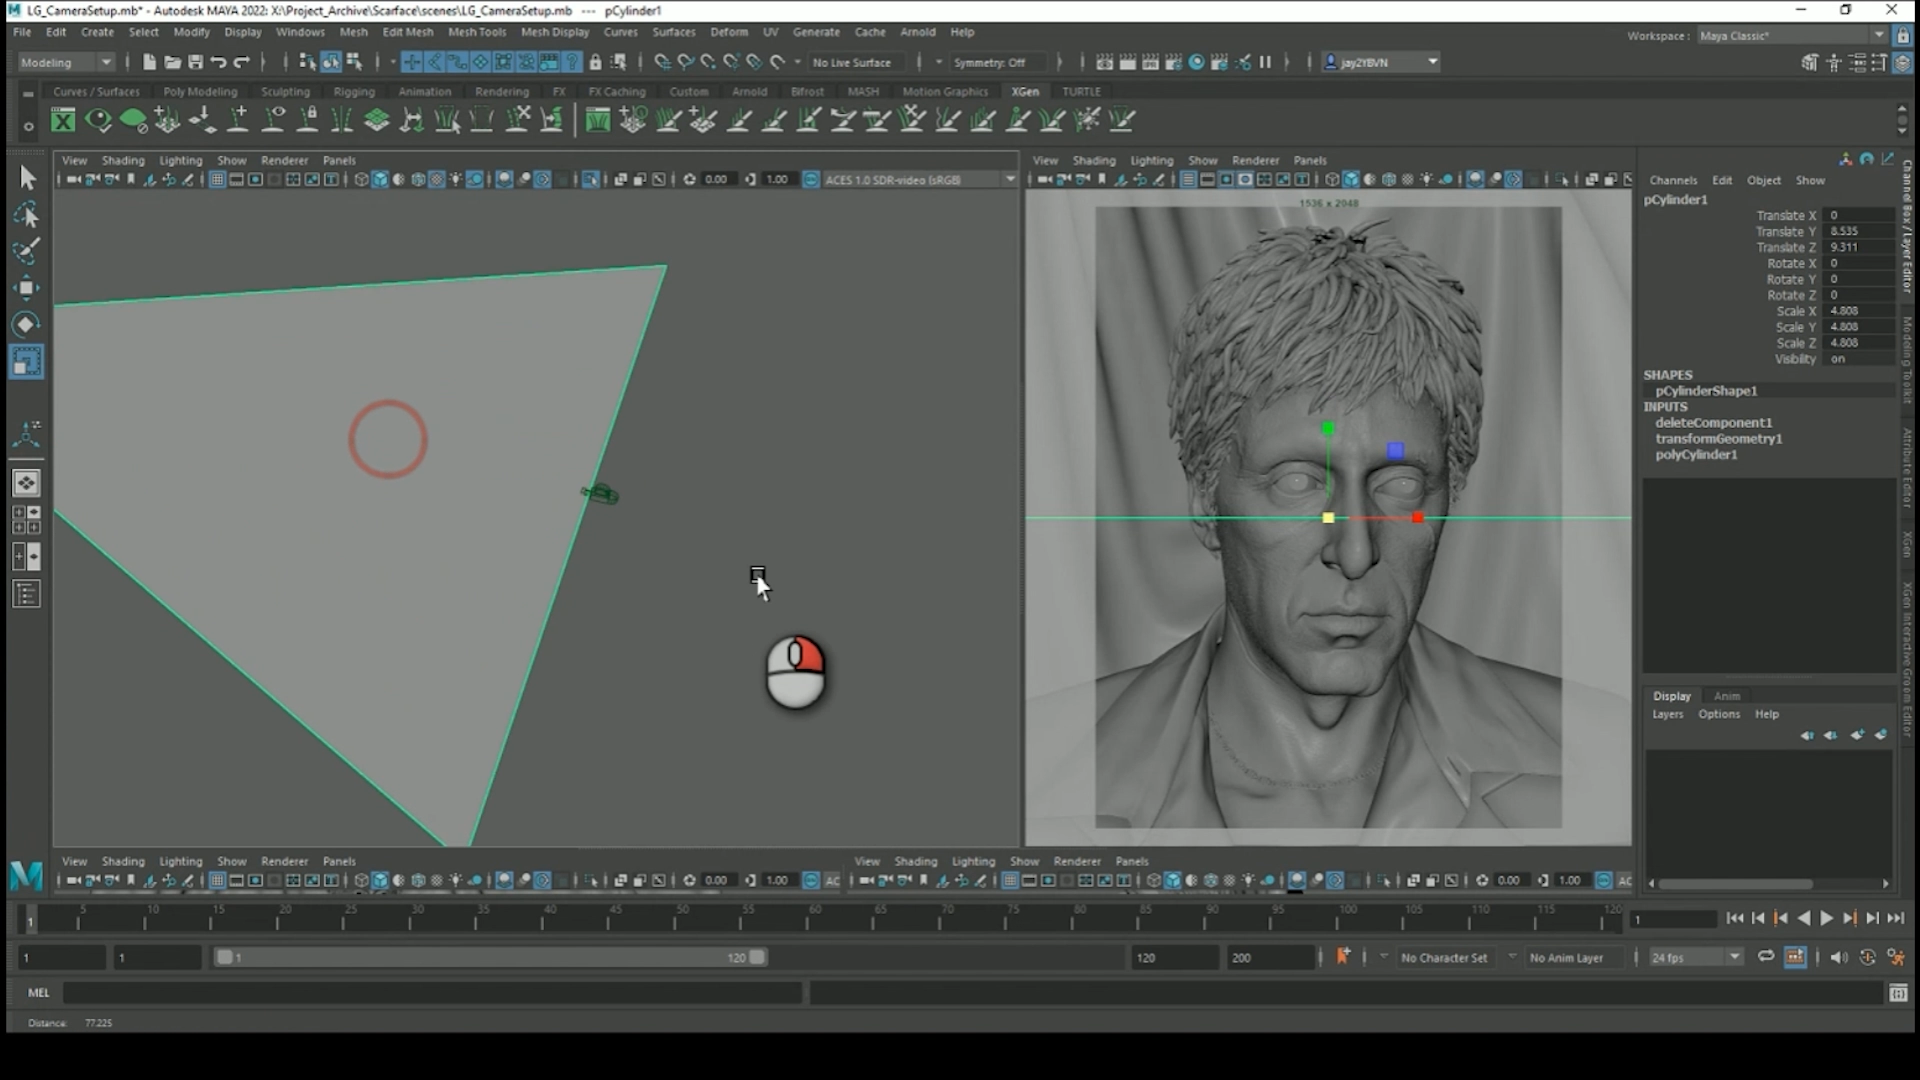
Then scale the guide until its edge reaches the Looking Glass camera you have previously set up. This edge will act as a guide for the camera path.
4. Keyframe the Camera
First make sure the animation timeline is set to frame 1, and using your default persp camera to navigate, select the LG_CAMERA, then hold V to enable snapping, and move the camera left to snap to the left corner of the guide segment.
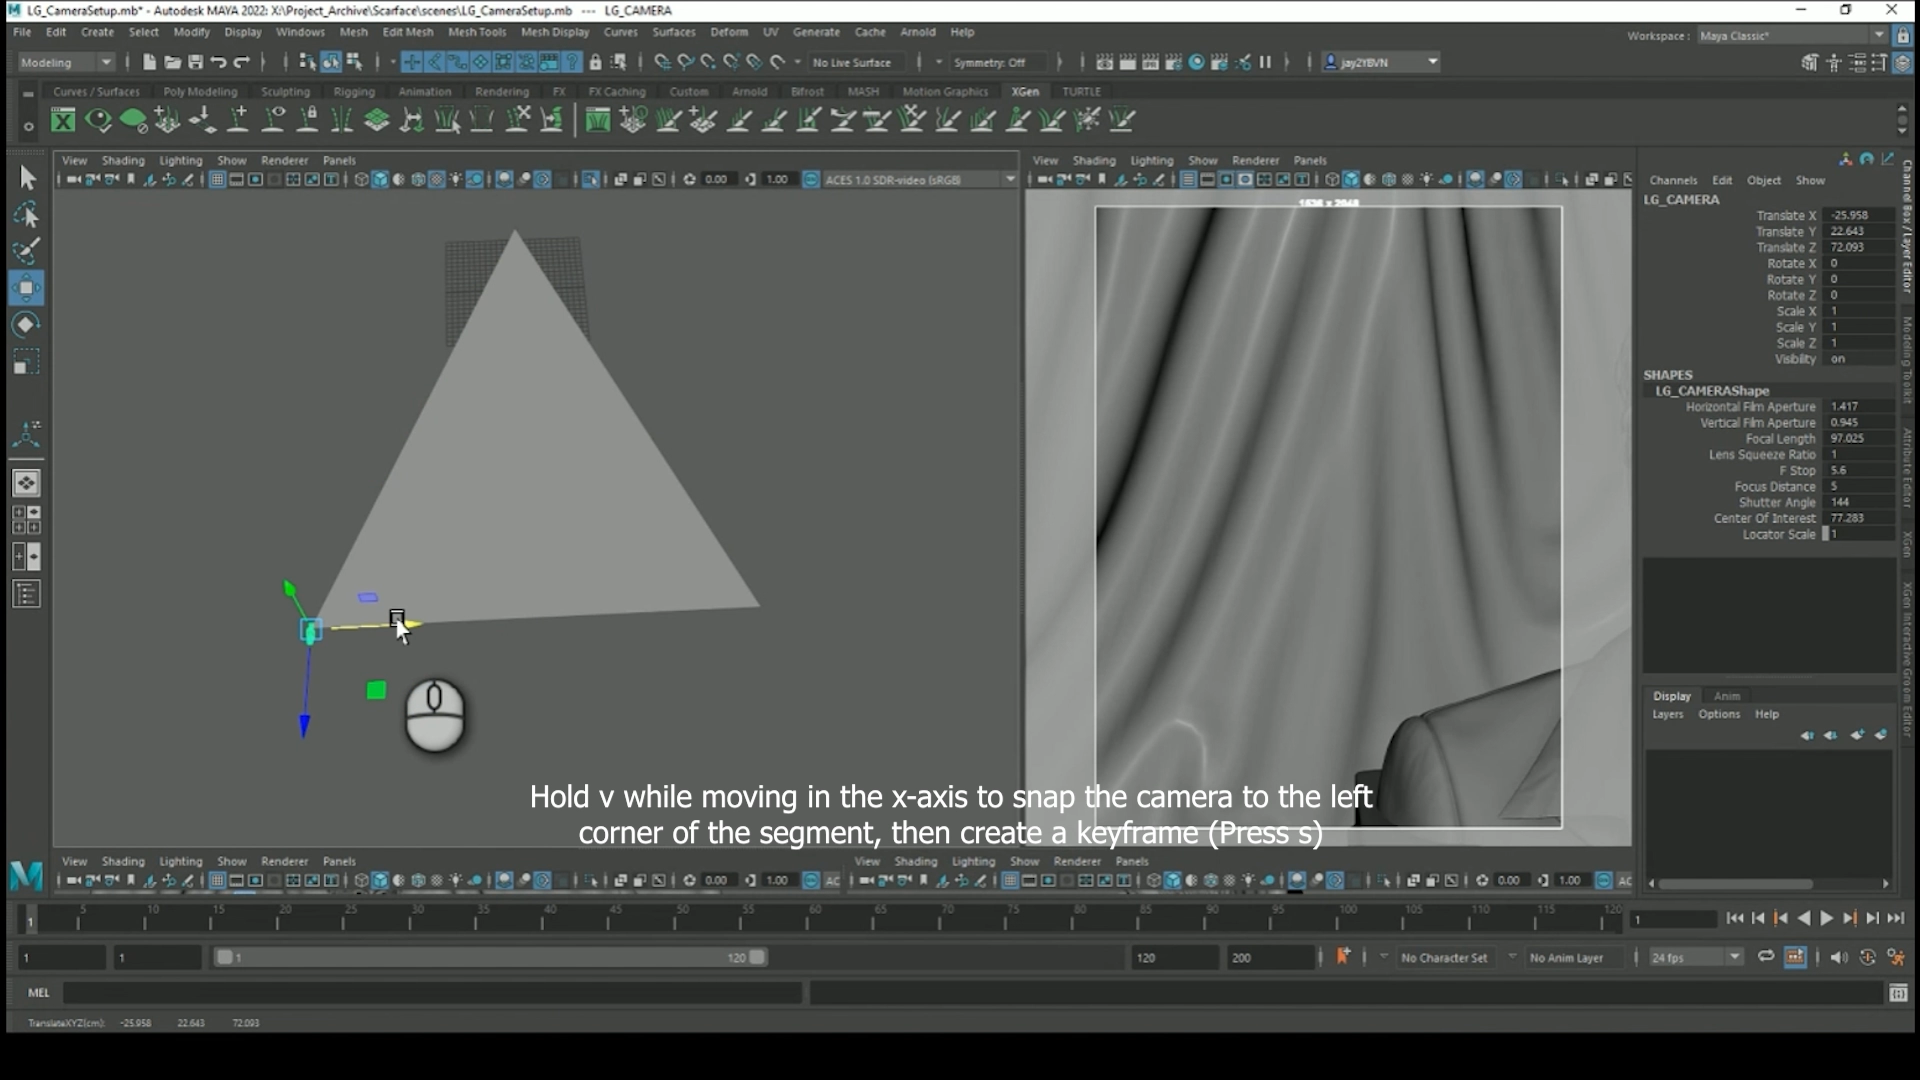
Then, still with the LG_CAMERA selected, create a keyframe by pressing S. Next, move the animation timeline to frame 45, snap the LG_CAMERA to the right corner of the guide, and set another keyframe.
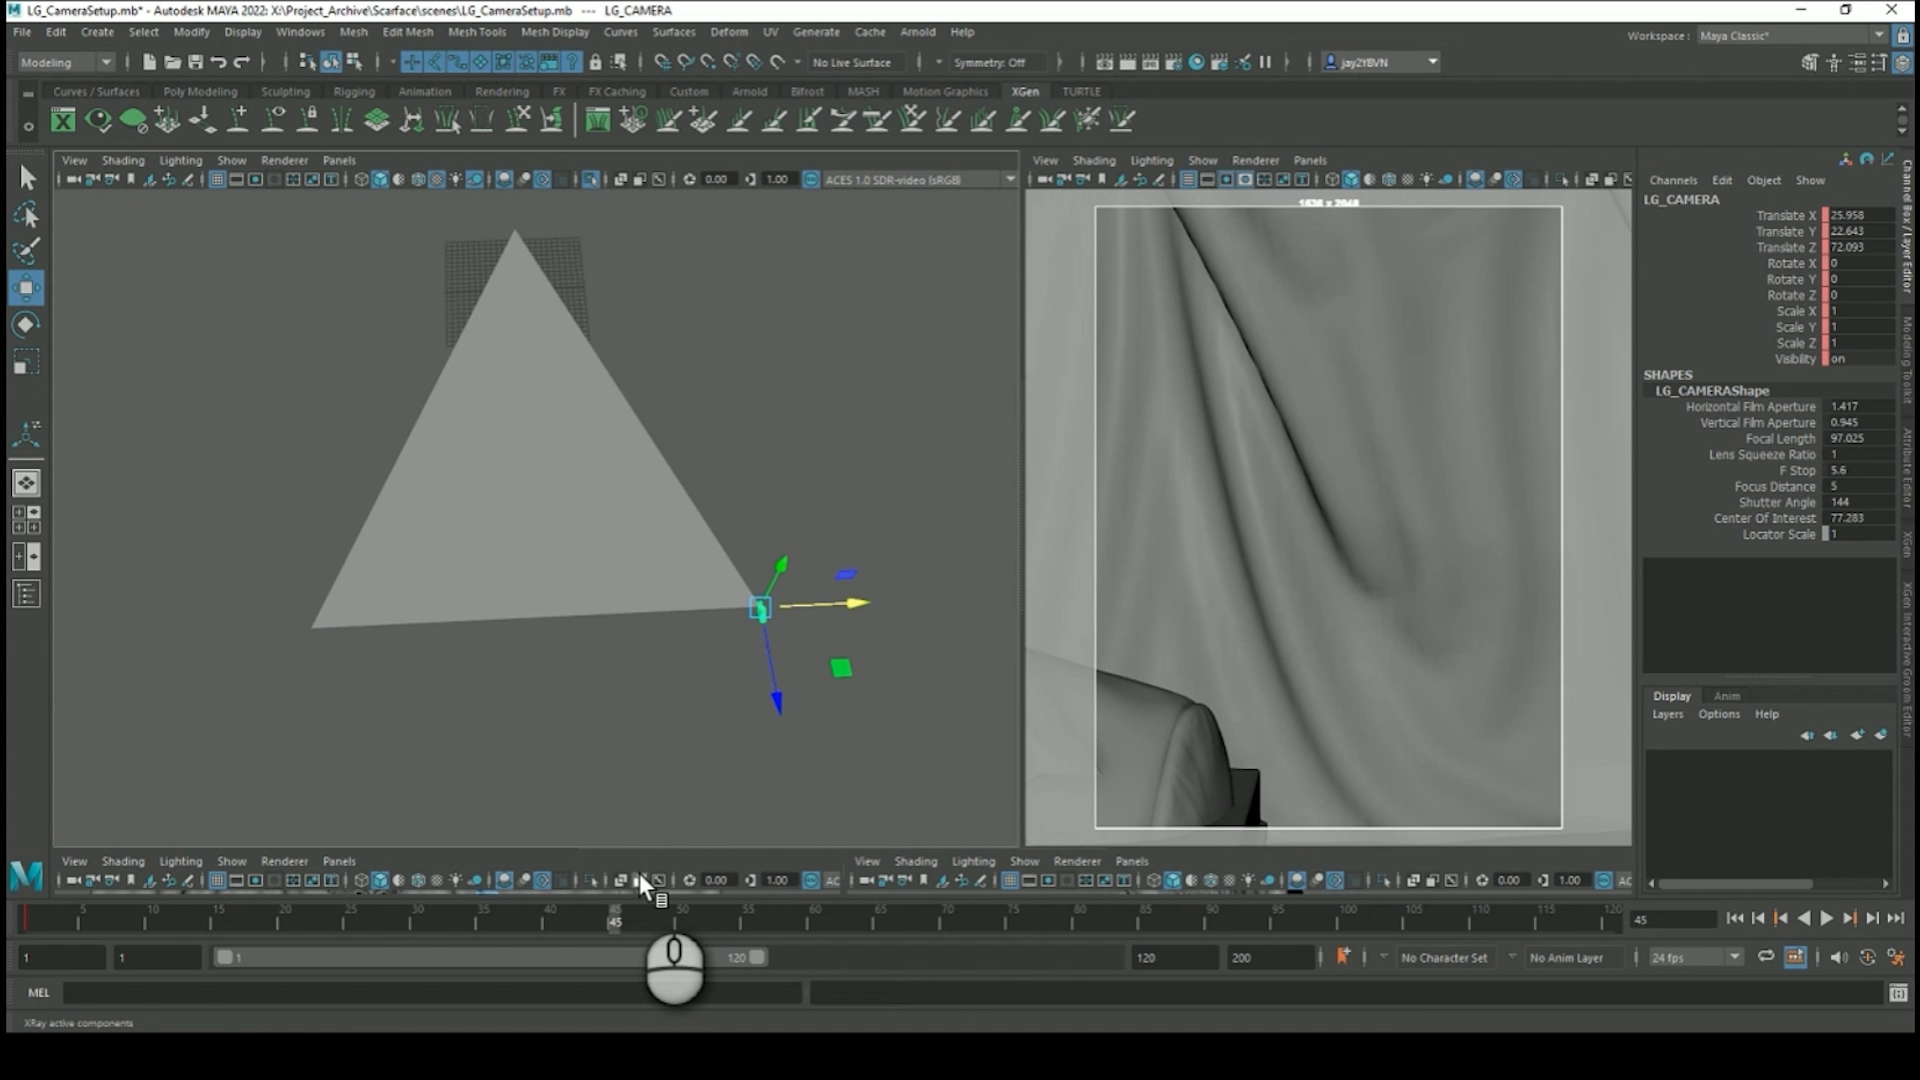
If you scrub back and forth through the timeline now, the camera should move from left to right. Finally, go to Windows> Animation Editors> Graph Editor, then select the Translate X curve and go to Tangents> Linear. This ensures that the camera moves at a constant speed so the rendered frames will all be spaced apart at equal intervals.
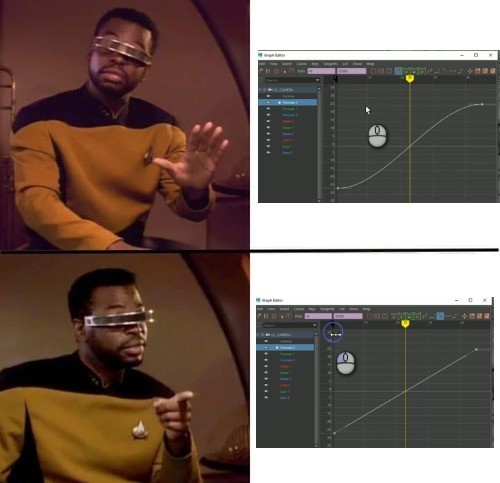
If you do not do the step above your light field will not render correctly in the Looking Glass!
5. Create Image Frame Guide Geometry
Next step is to create a frame guide geometry for the scene – the frame will be a representation of the screen of the Looking Glass, and represents the focal plane of the camera – Everything in front of this plane will appear in front of the screen of the Looking Glass and everything behind will appear behind.
So, first in the timeline set the frame to 22.5. This will be the ‘middle’ frame in a 45 frame sequence.
Next create a polygonal cube and scale to X=15.36 Y=20.48 (ignore the Z axis) This scales the cube to be the same size ratio as the render resolution (1536X2048).
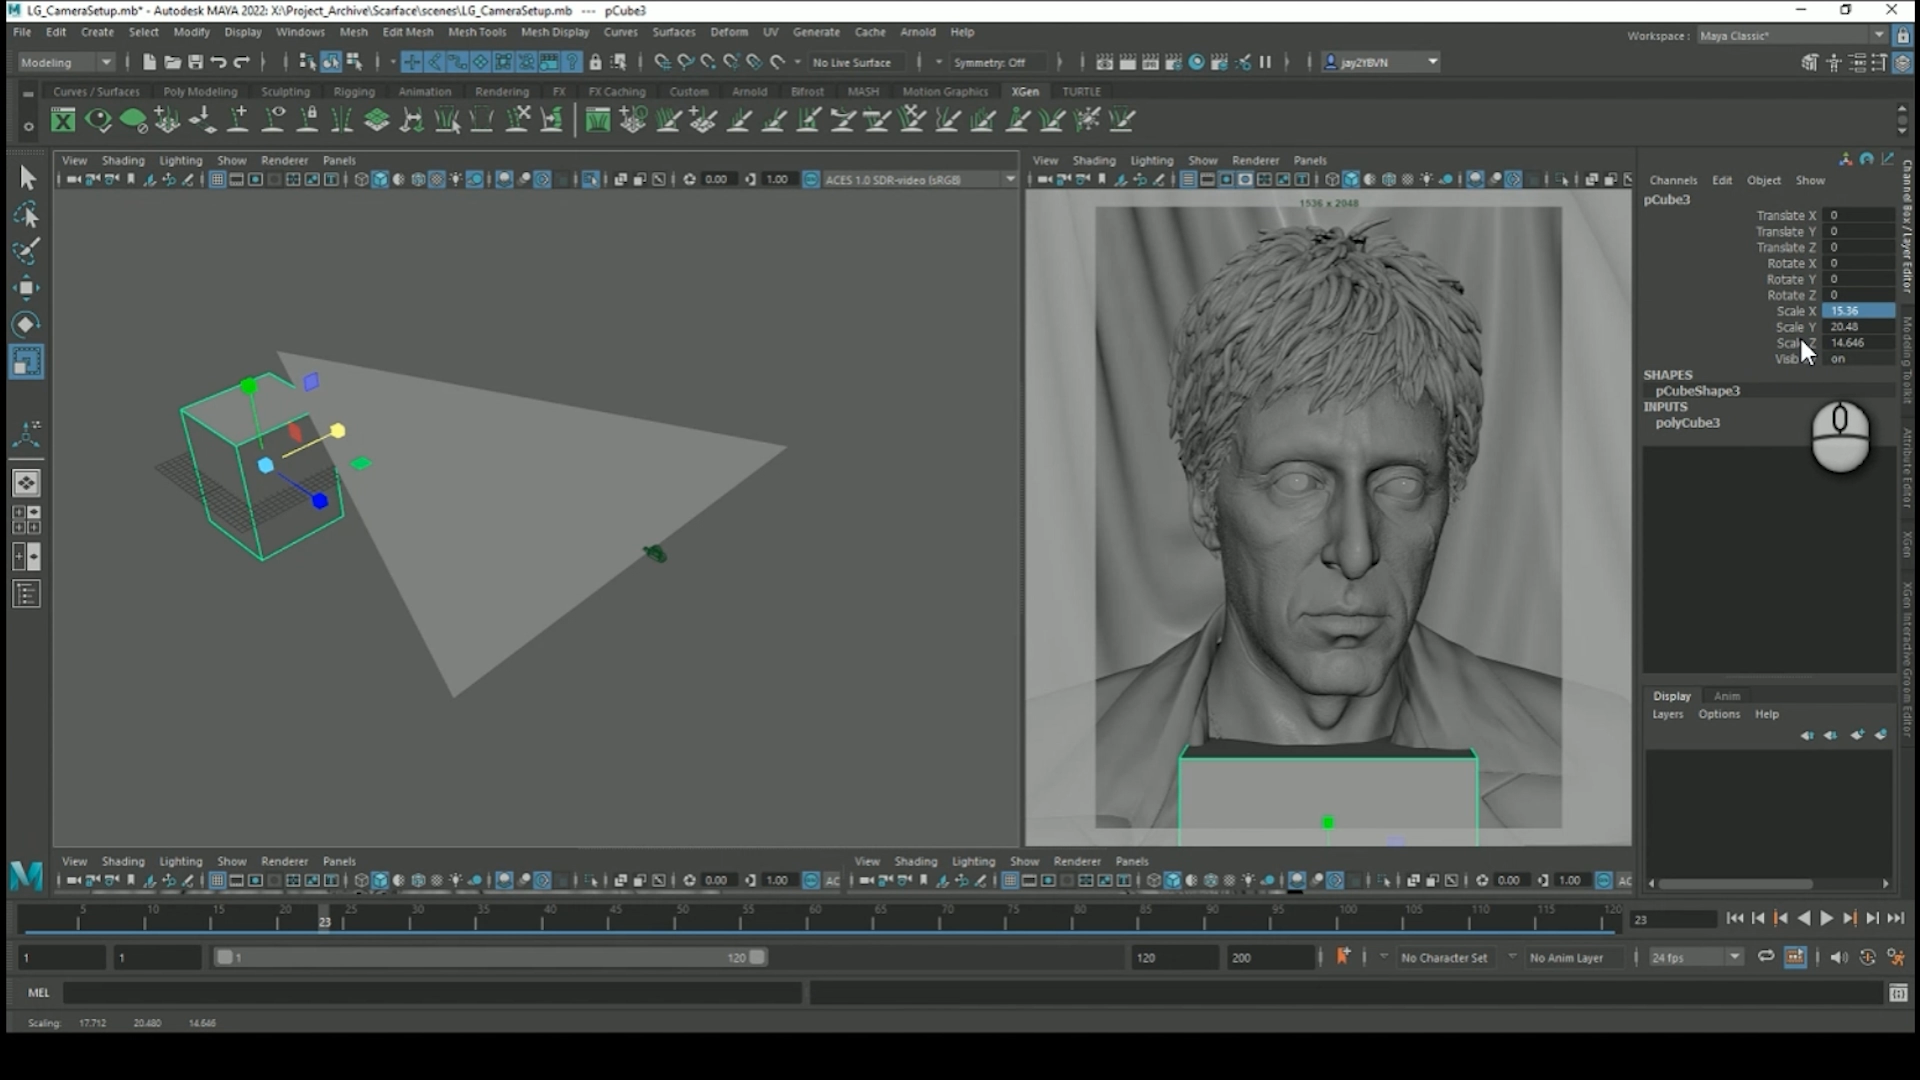
Uniform scale it to approximately the right size so it fills the LG_CAMERA view and delete all but the front face.

Now go to Modify> Center Pivot, then snap the plane to the point of your reference arc geometry.
Now, carefully scale this plane until it fills the LG_CAMERA window as close as possible. Extrude the face and offset slightly then delete the middle polygons to get a thin frame around your render window.
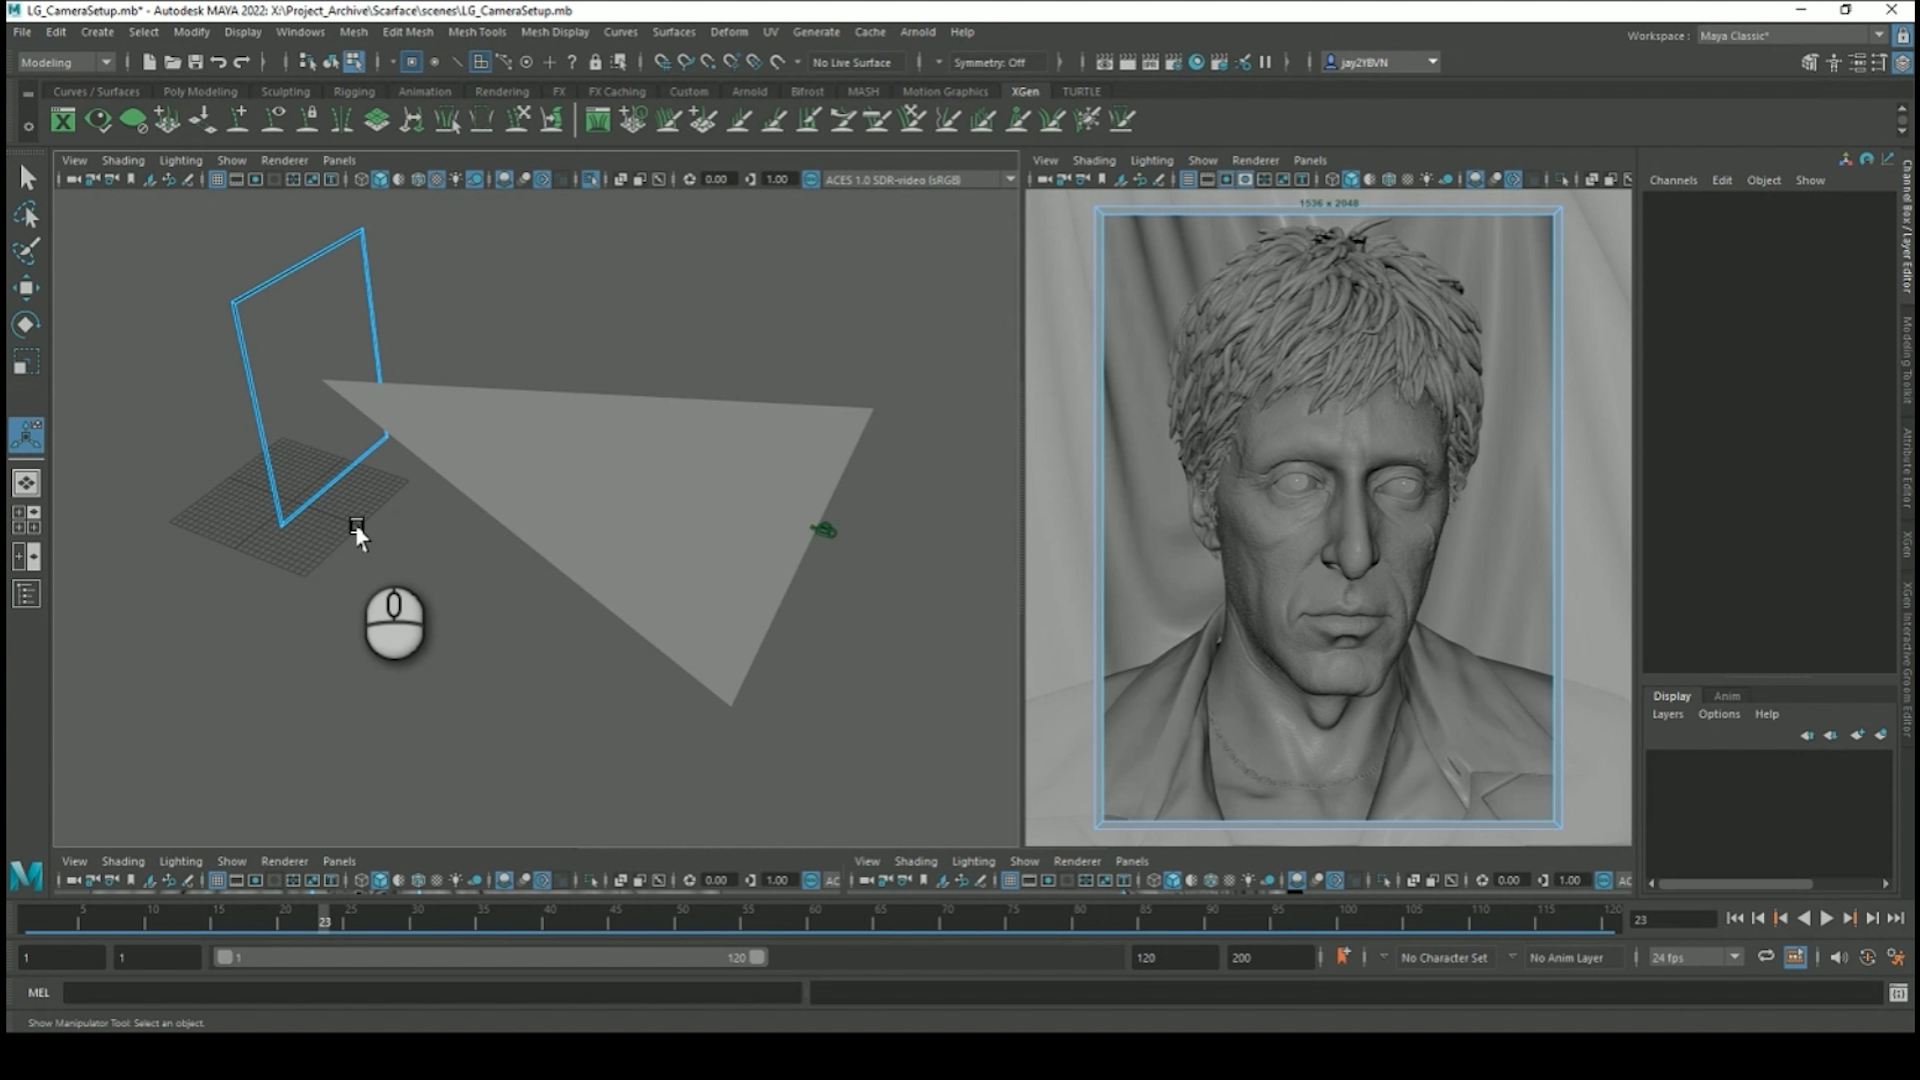
Important: Once you are happy with the position of the focal plane geometry select it and go to Modify> Freeze Transformations.
6. Keyframe the camera Film Offset value
At this stage you might have noticed the scene still does not stay in shot as you scrub the timeline.
Rather than toeing in the camera to keep the scene in shot, we change the film offset value instead – In your animation timeline go to frame 1 – the scene should go off to the right in the LG_CAMERA view.
Select the LG_CAMERA and press Ctrl + a to go to the camera attributes. Scroll down and change the Film Offset to a value of 1.5. This should move the scene back to the left, closer to the center.
This offset value will vary quite a bit depending on the scale of your scene so experiment with it. The idea is to get the reference frame geometry back so it fits perfectly into the LG_CAMERA window.
Once you have this value correct and the frame fits exactly, right click in the film offset value box and select Set Key. Then go to frame 45, set the film offset to the negative value of the film offset on frame 1 (eg -1.5) and Set Key again.
The last step is to open Windows> Animation Editors> Graph Editor again, and click on LG_CAMERA> Shape> Horizontal Film Offset. Select the curve and go to Tangents> Linear to ensure the offset value changes at a constant speed. Now if you scrub back and forth on the timeline, your scene should stay perfectly centered in the LG_CAMERA window.
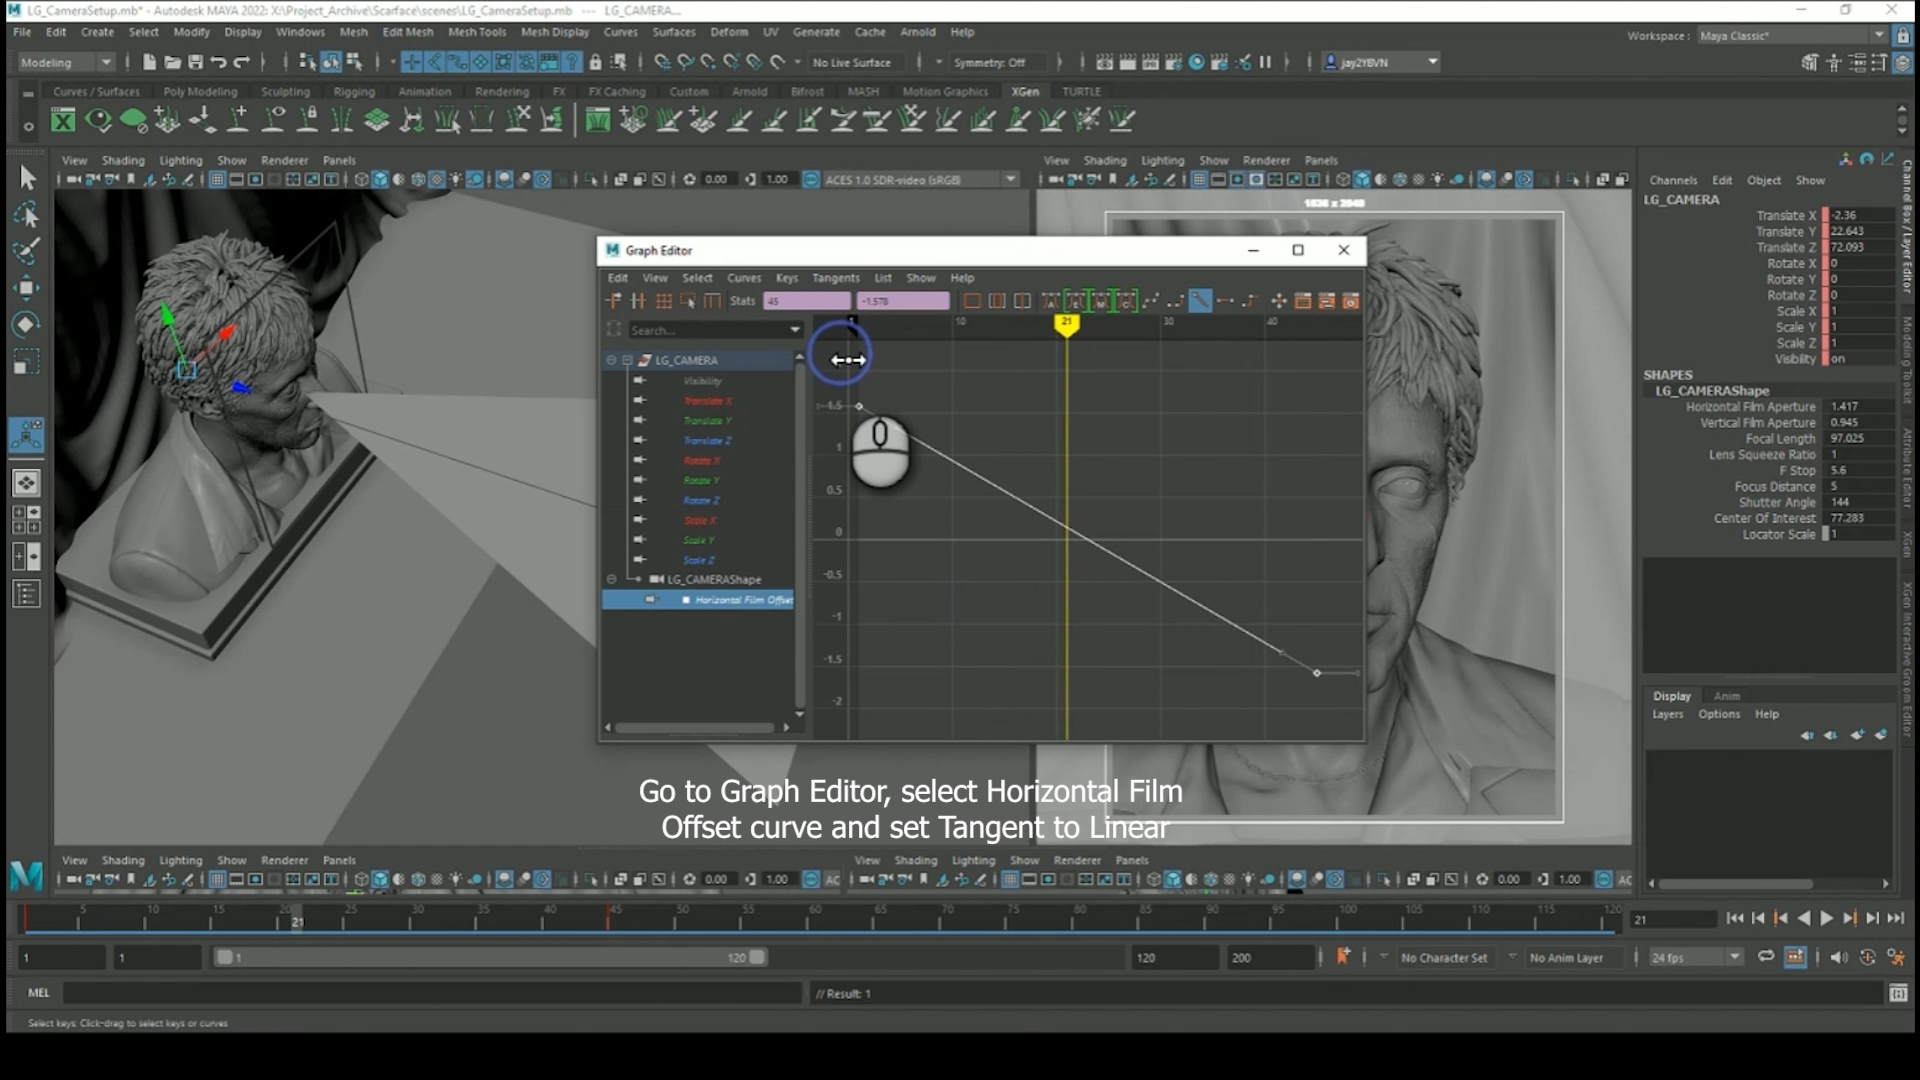
7. Parenting the camera to the reference frame
Select your reference frame geometry and rename it to LG_IMAGE PLANE_GUIDE, then select LG_CAMERA and parent it directly underneath LG_IMAGE PLANE_GUIDE.
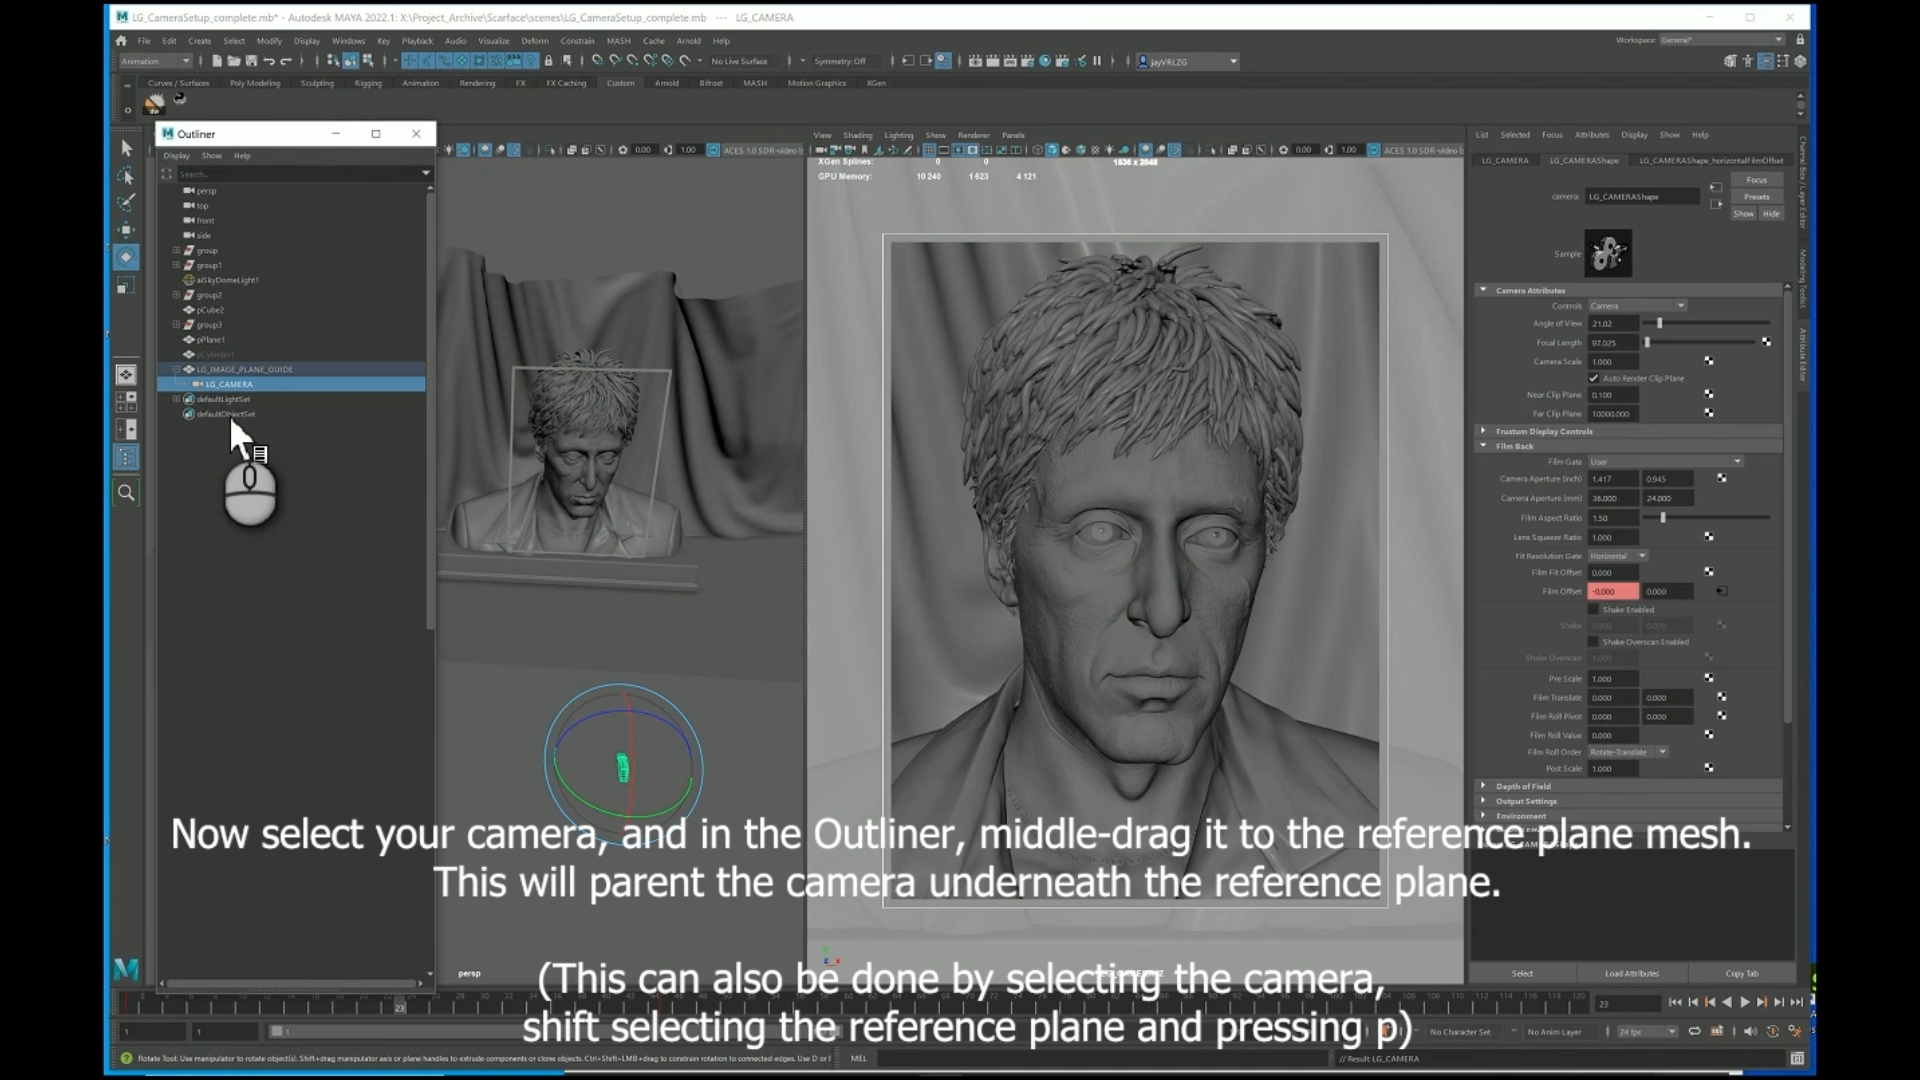
From now on, you shouldn’t move the camera directly - just select LG_IMAGE PLANE_GUIDE and it can be moved around the scene and rotated freely, and LG_CAMERA will follow. Remember, when the frames are rendered, everything in front of LG_IMAGE_PLANE_GUIDE will appear to come ‘out’ in front of the Looking Glass screen and everything behind it will appear to be behind the screen.
You can even scale LG_IMAGE PLANE GUIDE, and it will effectively scale the whole scene, making it larger or smaller in the frame, without needing to move the camera away from your scene and change the position of the image plane.
In general, on the Looking Glass, objects can appear further ‘back’ than they can appear in front of the screen – I typically set the focal plane so around three quarters of the scene is behind the image plane, and maybe one quarter is in front of it.
For a 3D portrait, for example, I would normally set the image plane around the eyes, so they are most in focus. The nose and mouth will come out slightly from the surface and the rest of the head will appear behind. This gives a good balance of positive and negative depth and means that everything can be kept in good focus.
8. Rendering your Light Field image set
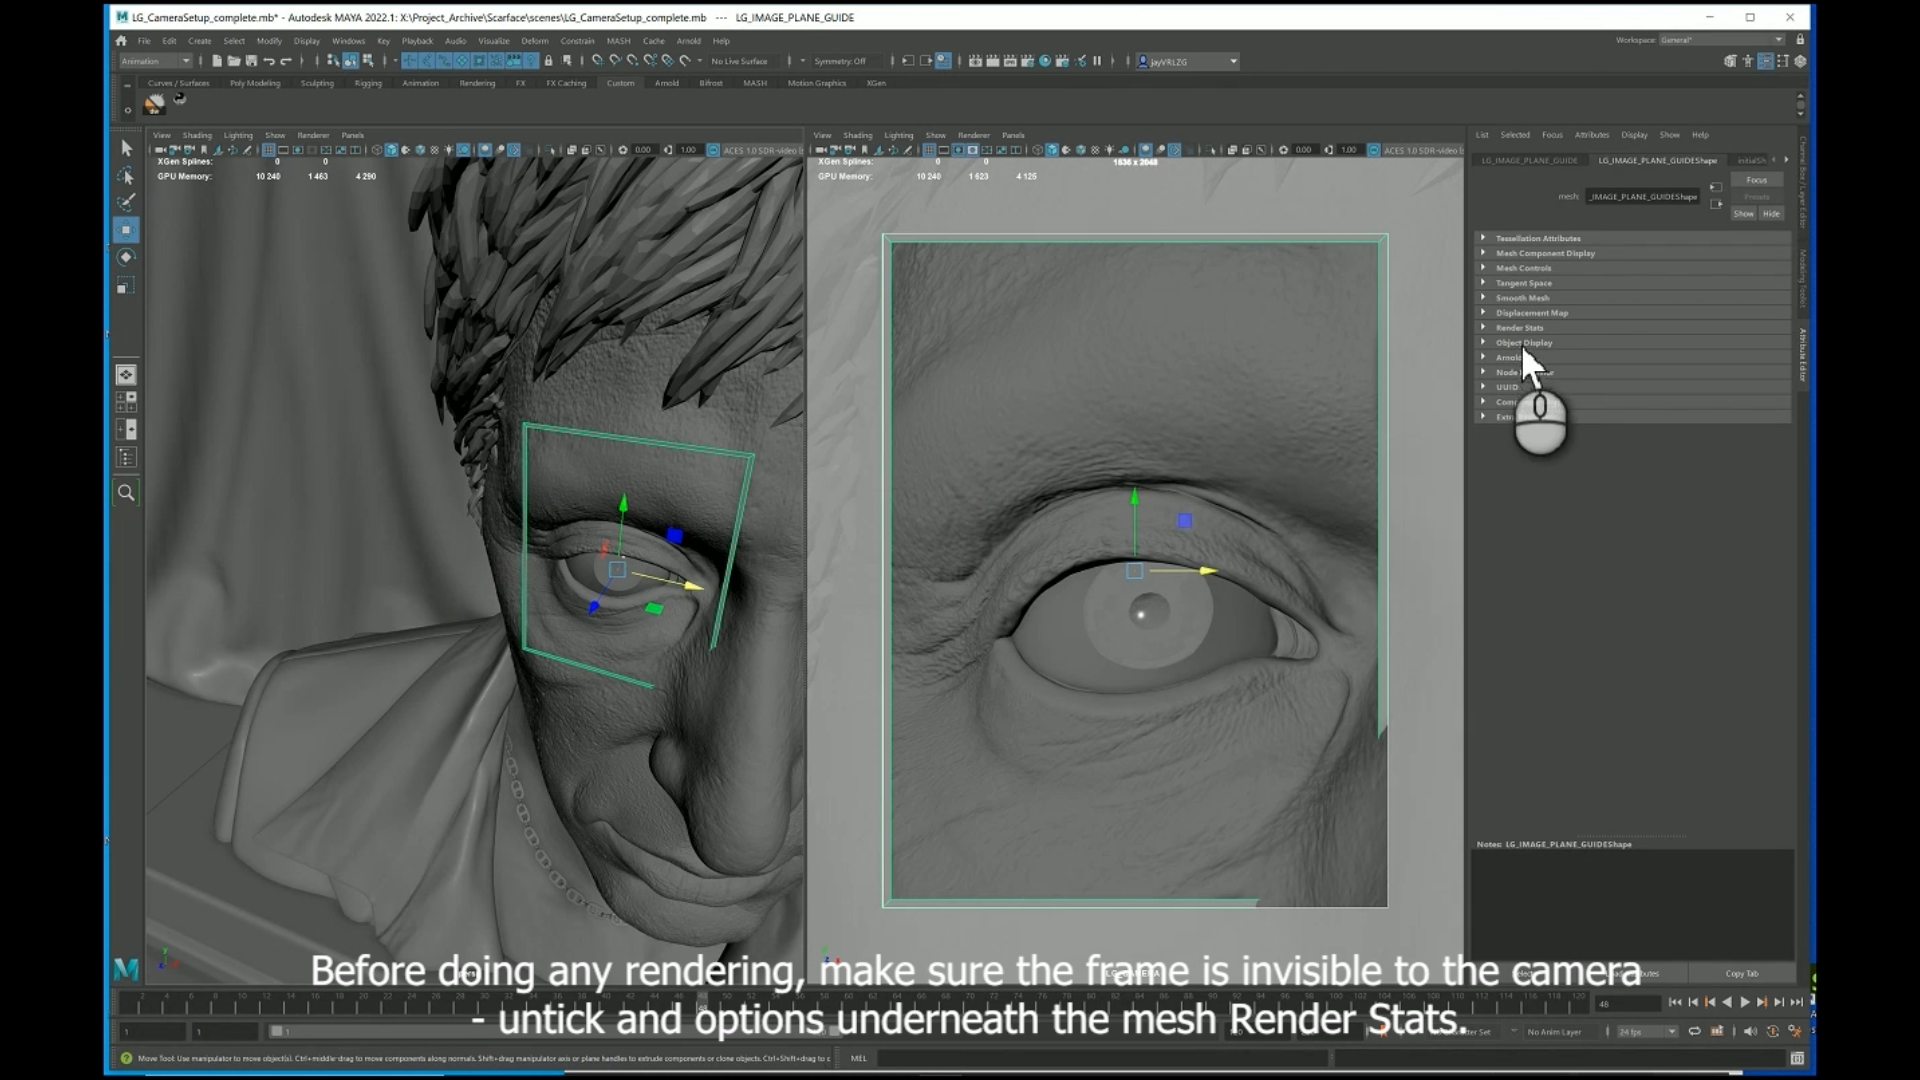
Hide the Reference Plane from the Render View
Before doing any rendering, make sure the frame we created in the previous step is invisible to the camera, select the guide, then untick the options underneath render stats.
Previewing your Render
It’s normally a good idea to do some test renders before you render a whole sequence. Once you are happy with your camera position and ready to render, go to Arnold>Open Arnold RenderView.
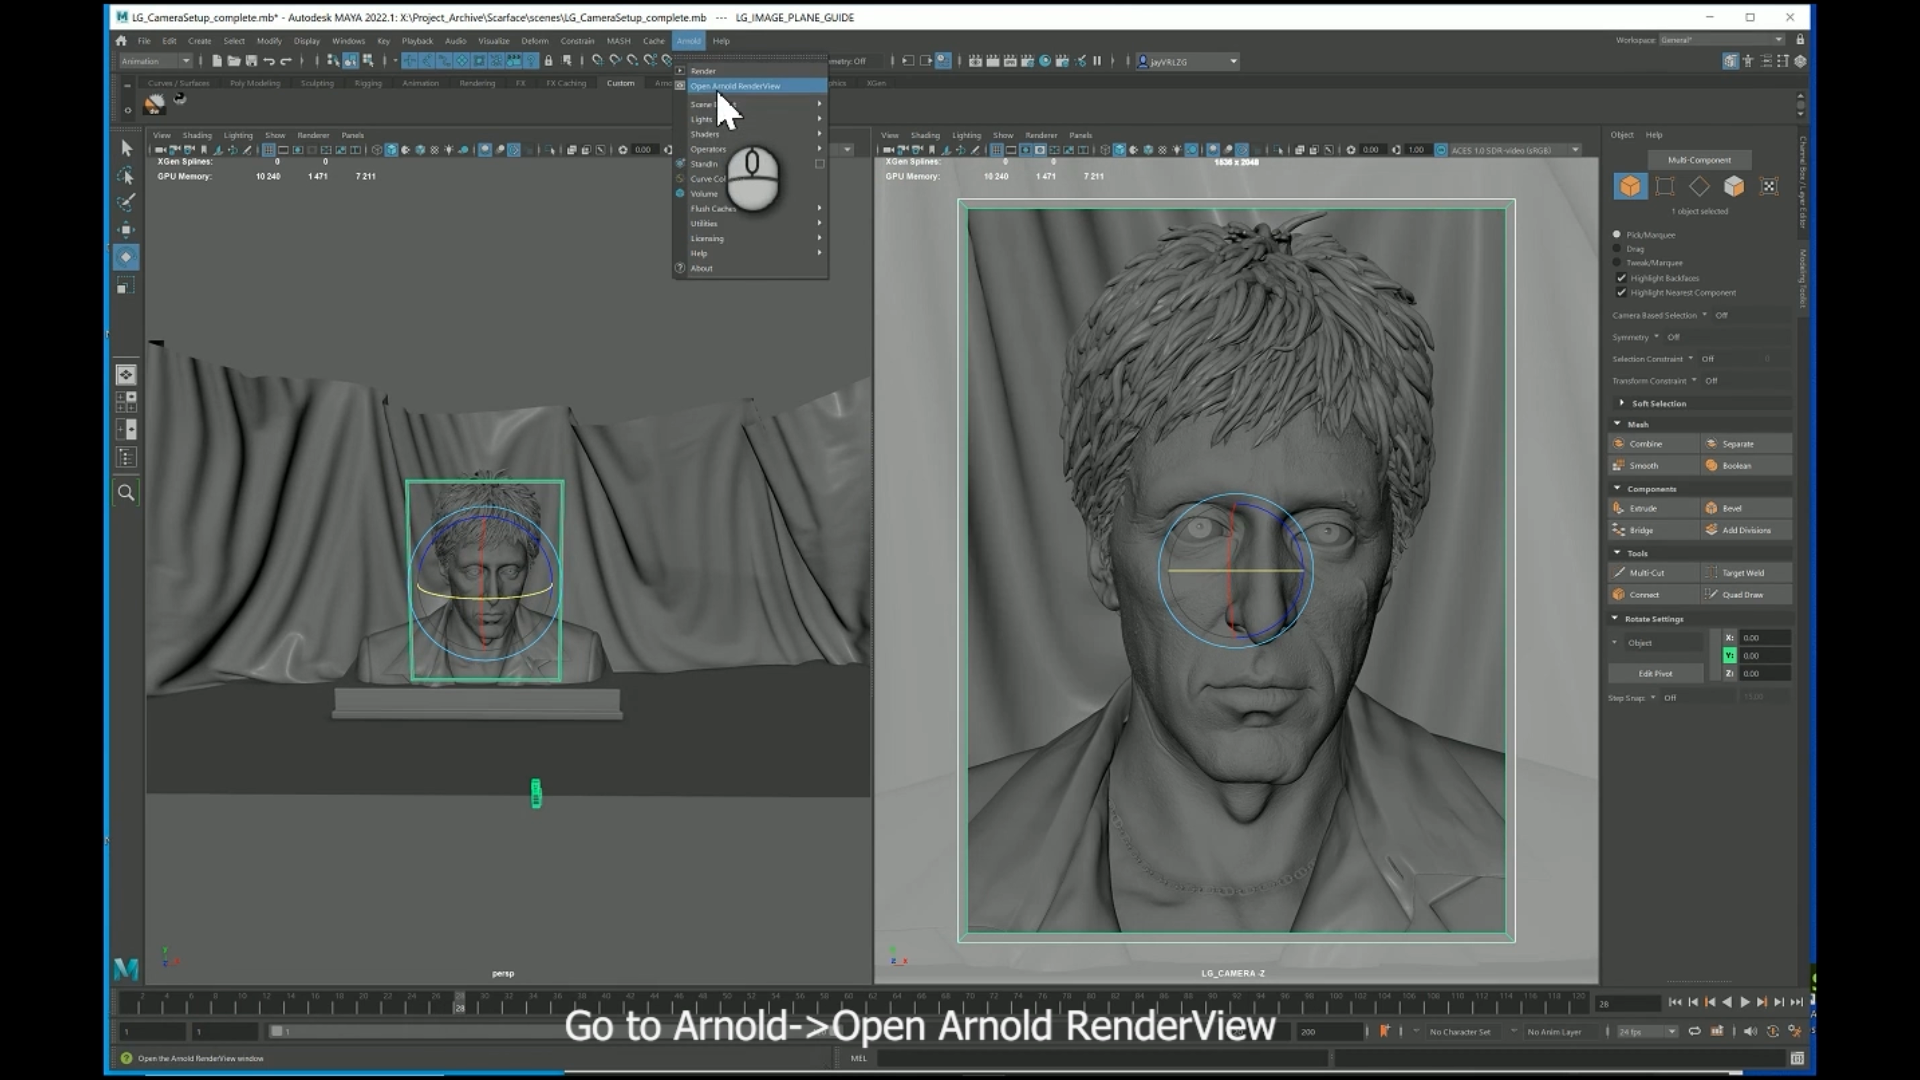
From the Renderview window you can go to View> Test Resolution and set it to 50 or 25% so it renders a faster preview.
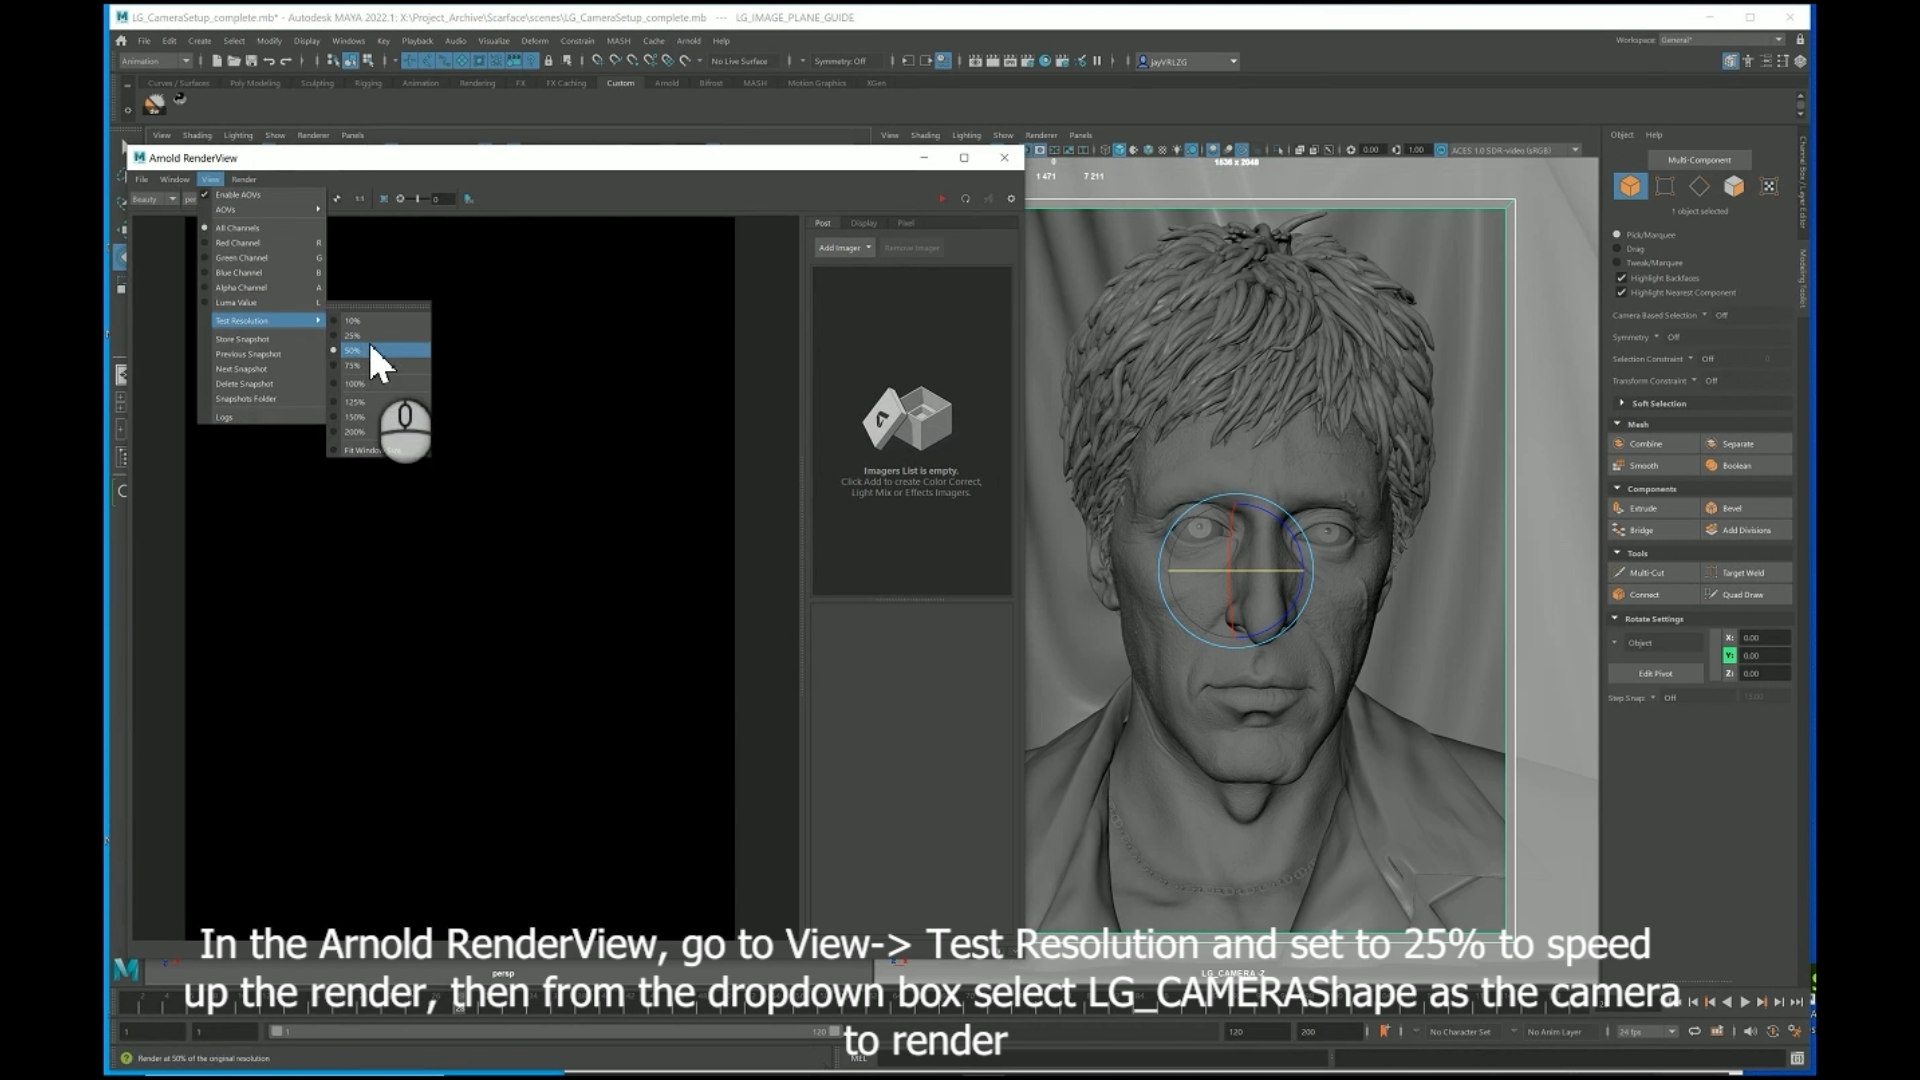
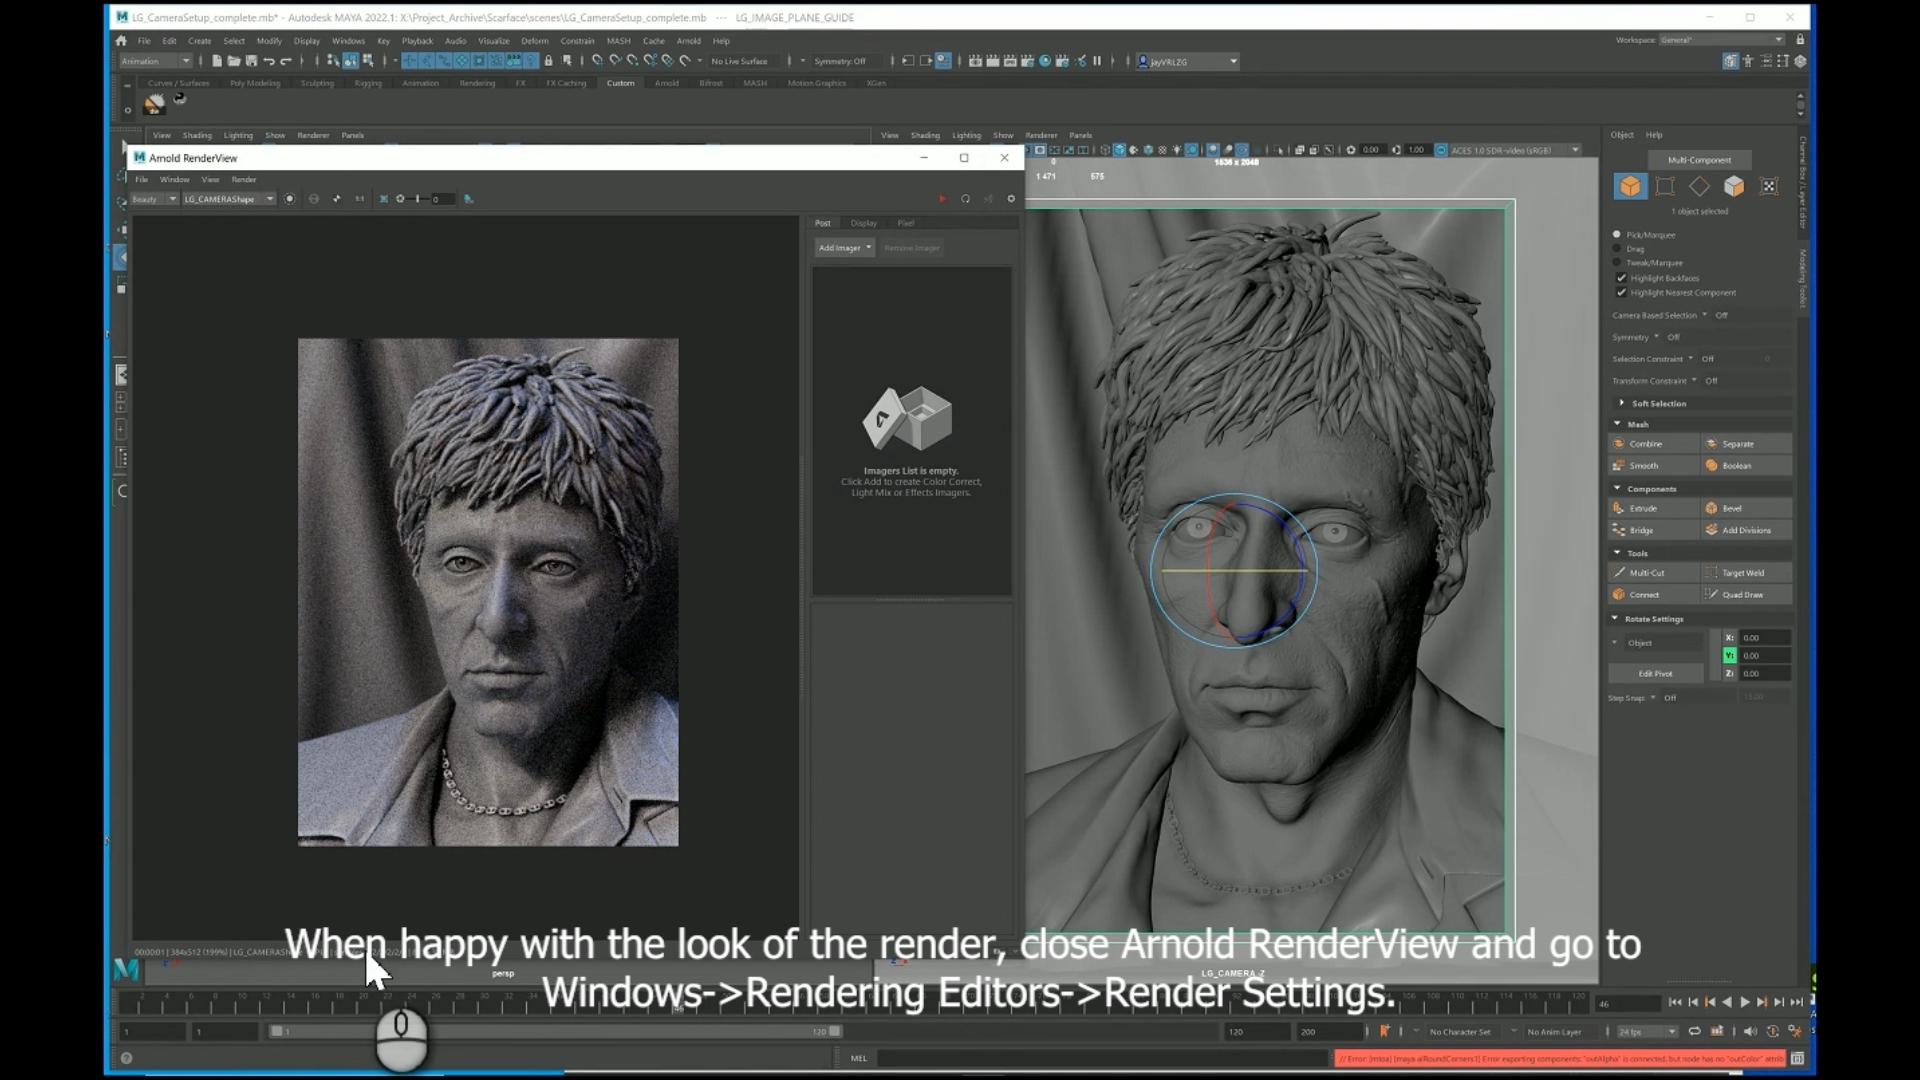
Select LG_CAMERA from the dropdown box and go to Render>Run IPR to set off a test render of the current frame.
Rendering with Final Settings
Once you have tested a few different frames in the sequence and you want to render the whole sequence, close the Arnold RenderView, open Windows> Rendering Editors> Render Settings.
Choose a suitable filename in File name prefix and select the image format you want (png and jpg can be read directly by the Looking Glass so stick with them)
In Frame/Animation ext selectname#.ext and set frame padding to 3. Set start frame to 1 and End frame to 45 and set Renderable Camera to LG_CAMERA.
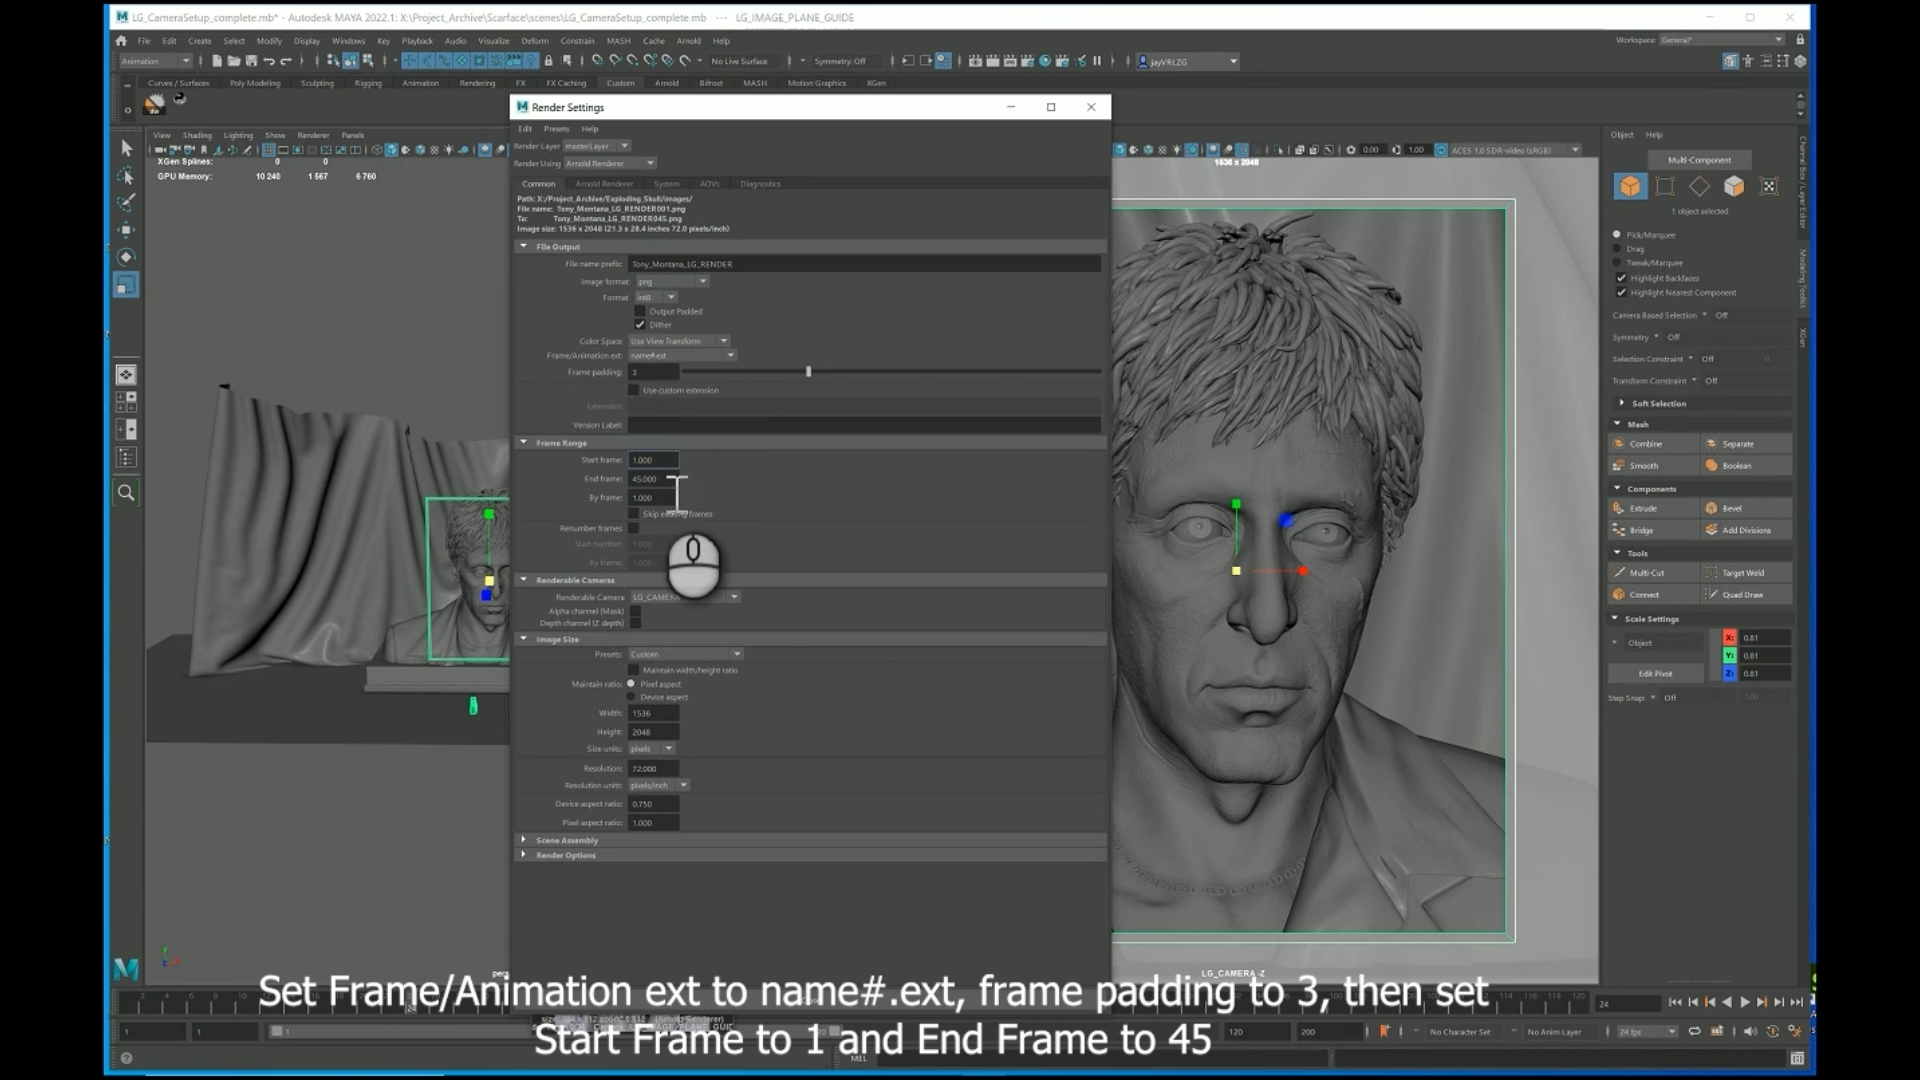
Untick Alpha Channel or Depth Channel if selected, then close the Render Settings Window.
Next go to Windows> Rendering Editors> Render View. Make sure the renderer is set to Arnold Render (or your renderer of choice) then go toRender> Render Sequence and click on the box to the right to open up the options. From here, select LG_CAMERA as the Current camera, leave everything else unticked and select an Alternate Output File Location if required. Then click Render Sequence and wait…
9. Displaying your Light Field Image set
Once you have your image set rendered, make sure they are in a folder on their own with no other files.
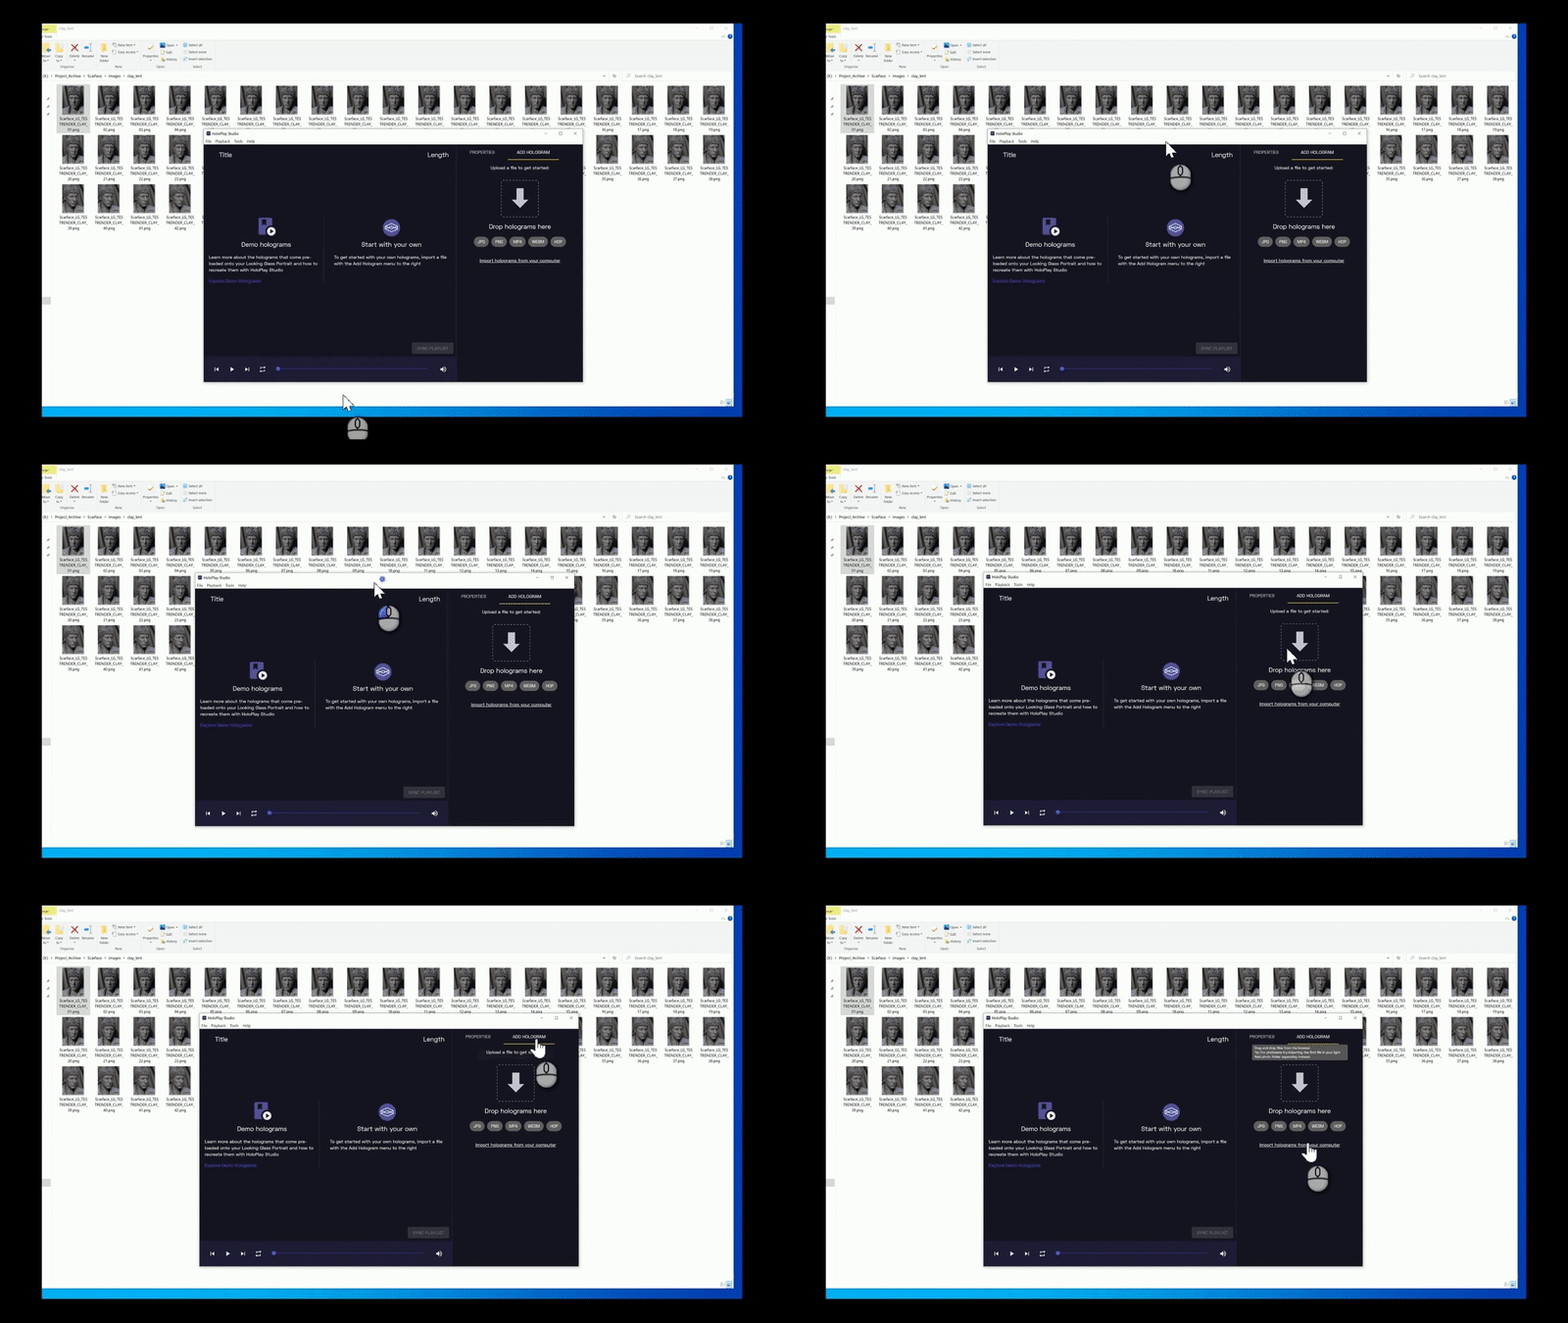
Open Looking Glass Studio, go to create hologram, select light field image set and then select the first image in the set.
Initially the image may look strange and appear pseudoscopic (depth is reversed). Just click on reverse images to fix this and view your 3D image.
We're always excited to see what you're making!
If you have any questions, please reach out to us! You can reach the team at Looking Glass Factory at developer@lookingglassfactory.com!
Share with us your Maya light field renders, either in the Discord, or by tweeting and tagging @lkgglass


.gif)