

Capturing a Light Field
There are a few different methods to capture light fields, including Linear Capture, Arc Capture and View Shearing Capture. View shearing capture is only possible on virtual cameras in 3D software.
While you can have a theoretically infinite amount of images in a light field photoset, there are diminishing returns above 45 views. Generally, there is a small difference between 45 and 99 views in that items that are further away from the focal plane of the Looking Glass display will appear slightly sharper, but it is very minimal. For most cases, we'd recommend 45 views, but feel free to experiment!
Resolution Matters!
In general, you'll want your light field captures to be at least 3840x2160 in resolution per frame. Dropping below this will cause a loss in sharpness and visual fidelity!
Speed as a Constant
Currently, light fields need to be captured at a constant speed. In 3D software, you'll want to make sure your keyframes are set to linear. If they have easing on them, it will stack up too many similar frames and cause some visual artifacts.
Linear Capture
Linear capture of light fields is one of the most common light field capture methods, either in the physical realm with a camera rail, or in digital tools like Blender, Unreal, Unity, 3s Max, Cinema 4D, and others. If you can move a camera left to right (or right to left), you're set!
Okay, so what are the rules? How much should my camera travel? How far should my subject be from my camera? Great questions! There are a few formulas that will determine where to position your subject and how far your camera will need to travel.
Visual Explanation
In this example, we have a camera with an FOV (field of view) of 58 degrees (equivalent to a 39mm lens). We can see through the visualization that there's a specific area where the two camera views overlap and some areas at the edges where they don't. So, what's the deal here? In short, as long as your subject is within the overlapping view cone and is visible in all of your views, you'll be able to get a great light field.
The distance between these two triangles is labeled as the travel and the height of the intersection is labeled as the distance. The triangle we want to solve for is actually the white triangle in the middle there but split in 2 to give us a right angle.

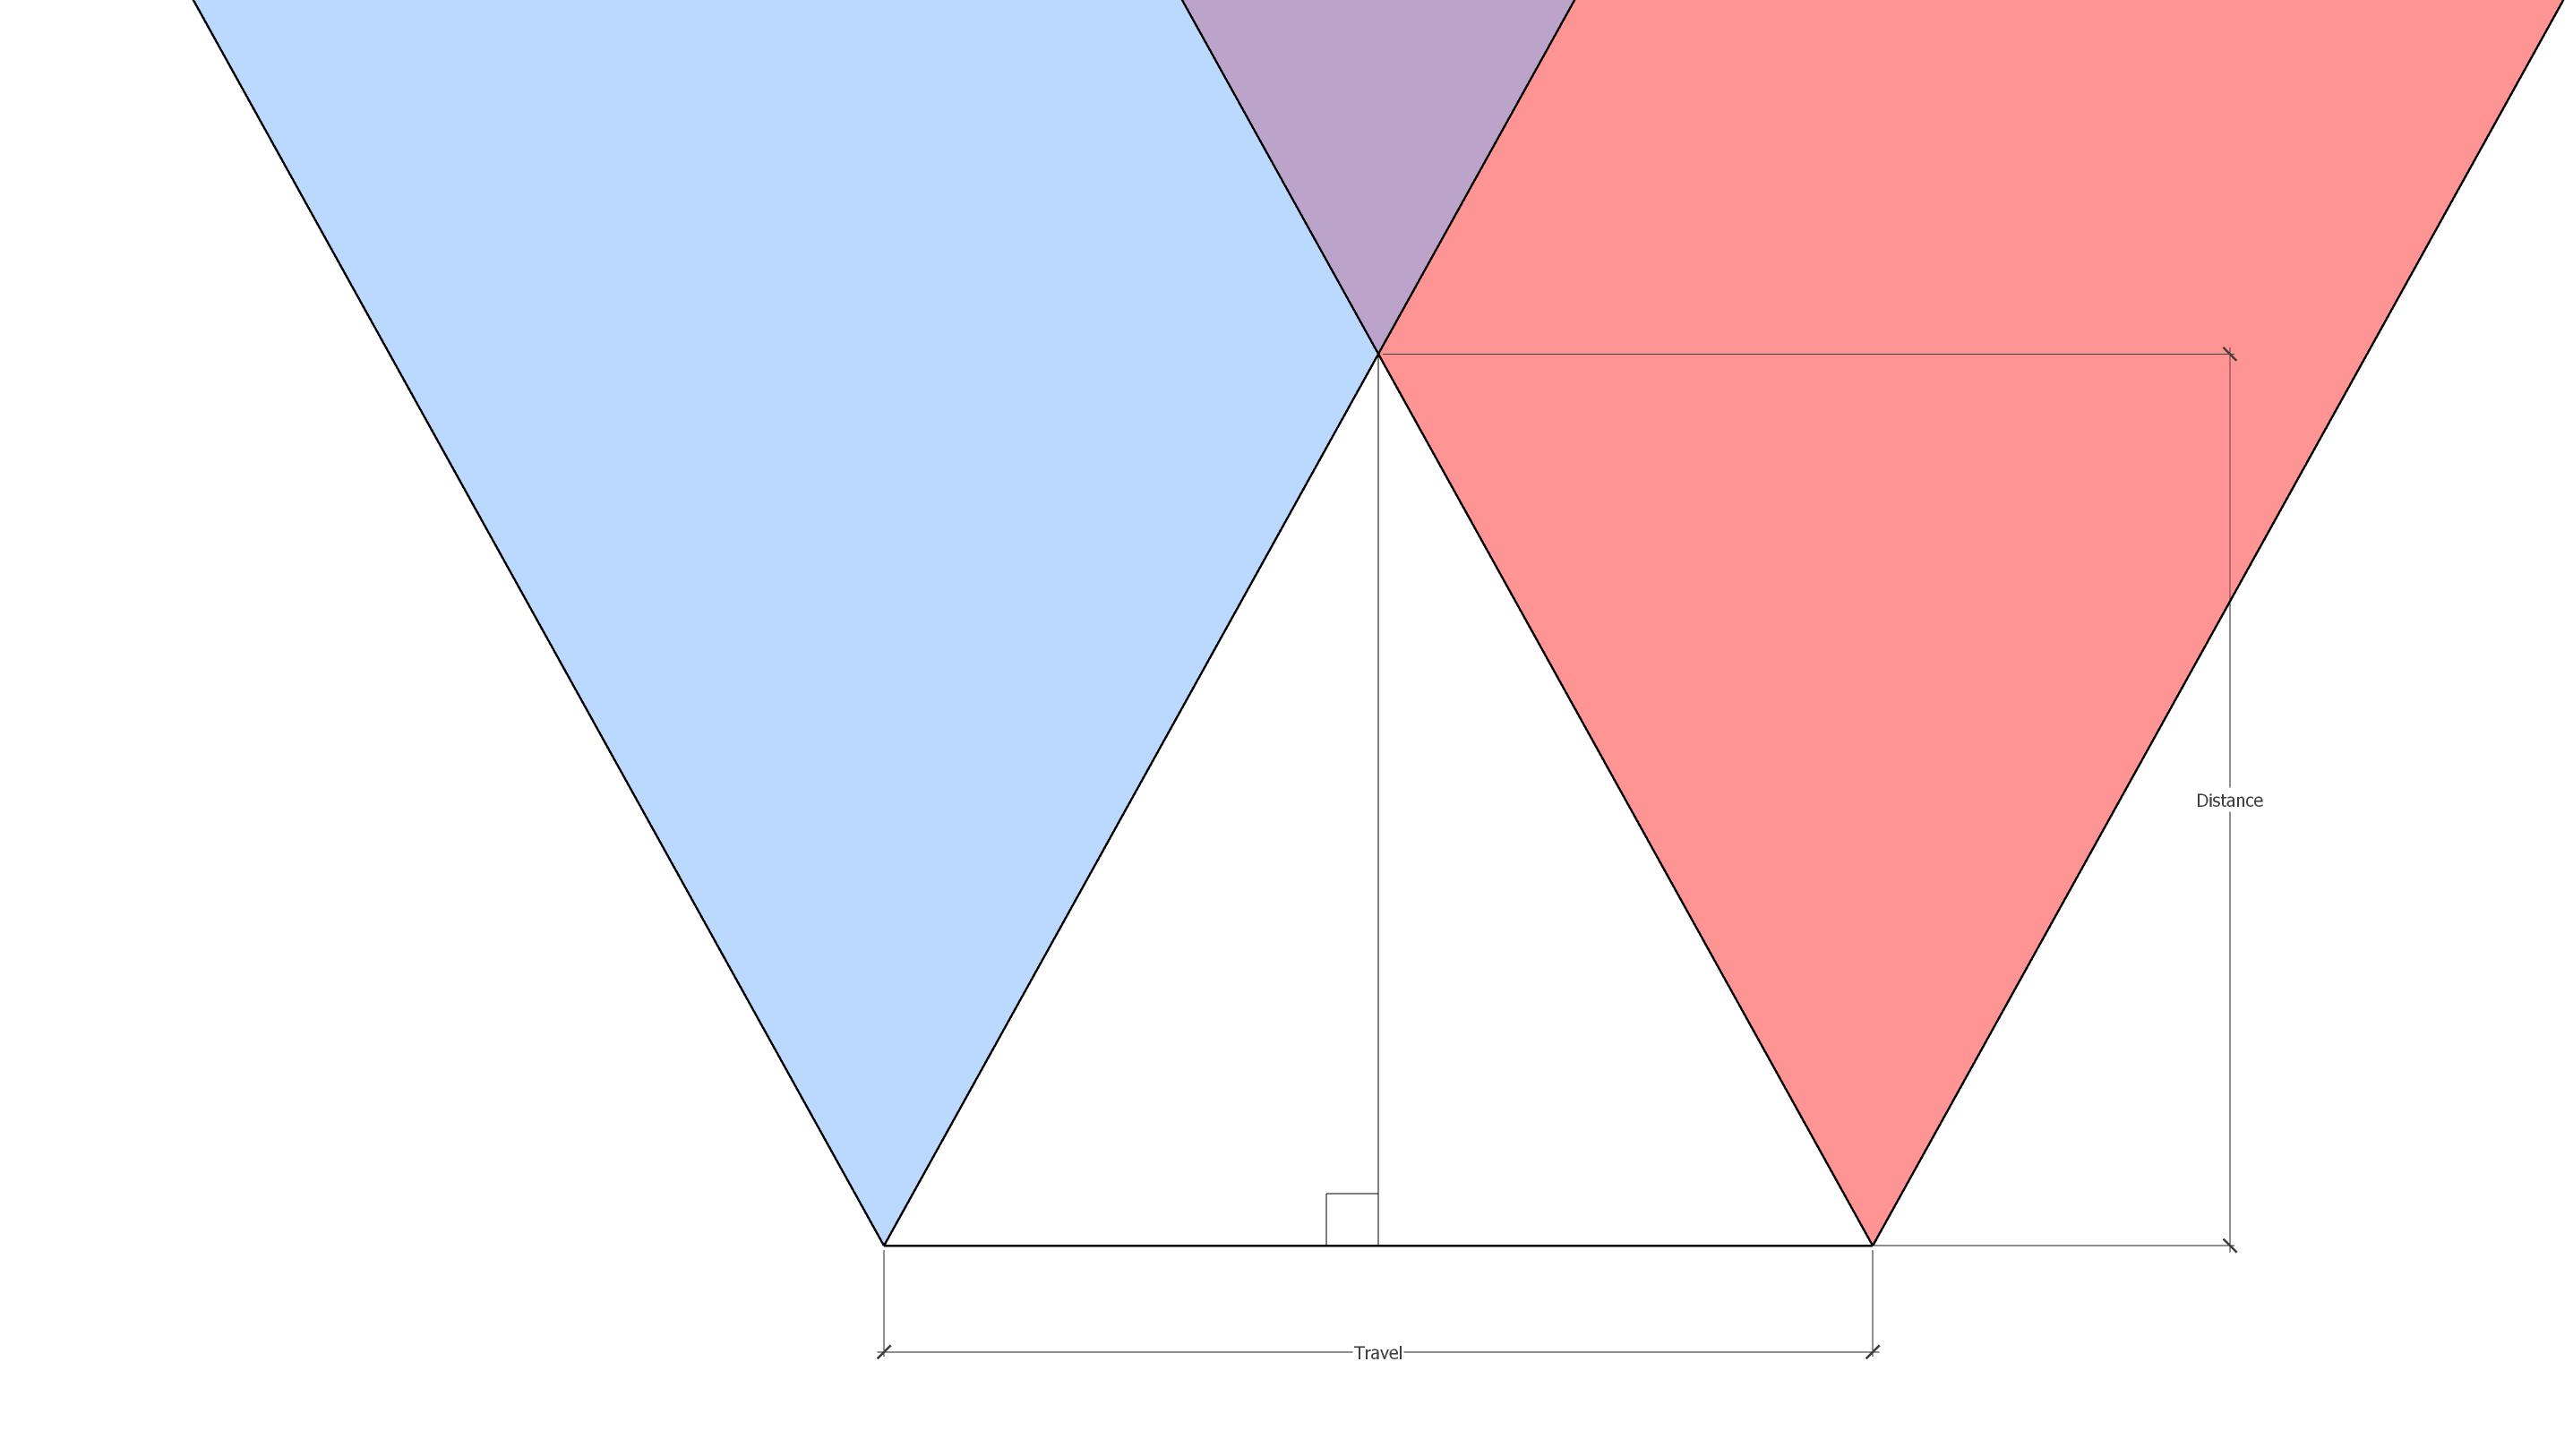
We've got this triangle now - but what does this mean? Will my subject have to be at the focal point between these two views? Not exactly! What we've just determined is the minimum distance in which your subject can be relative to your camera. For a proper photoset, you'll want to ensure that your subject is in the purple region, meaning that it's visible in every view in between!
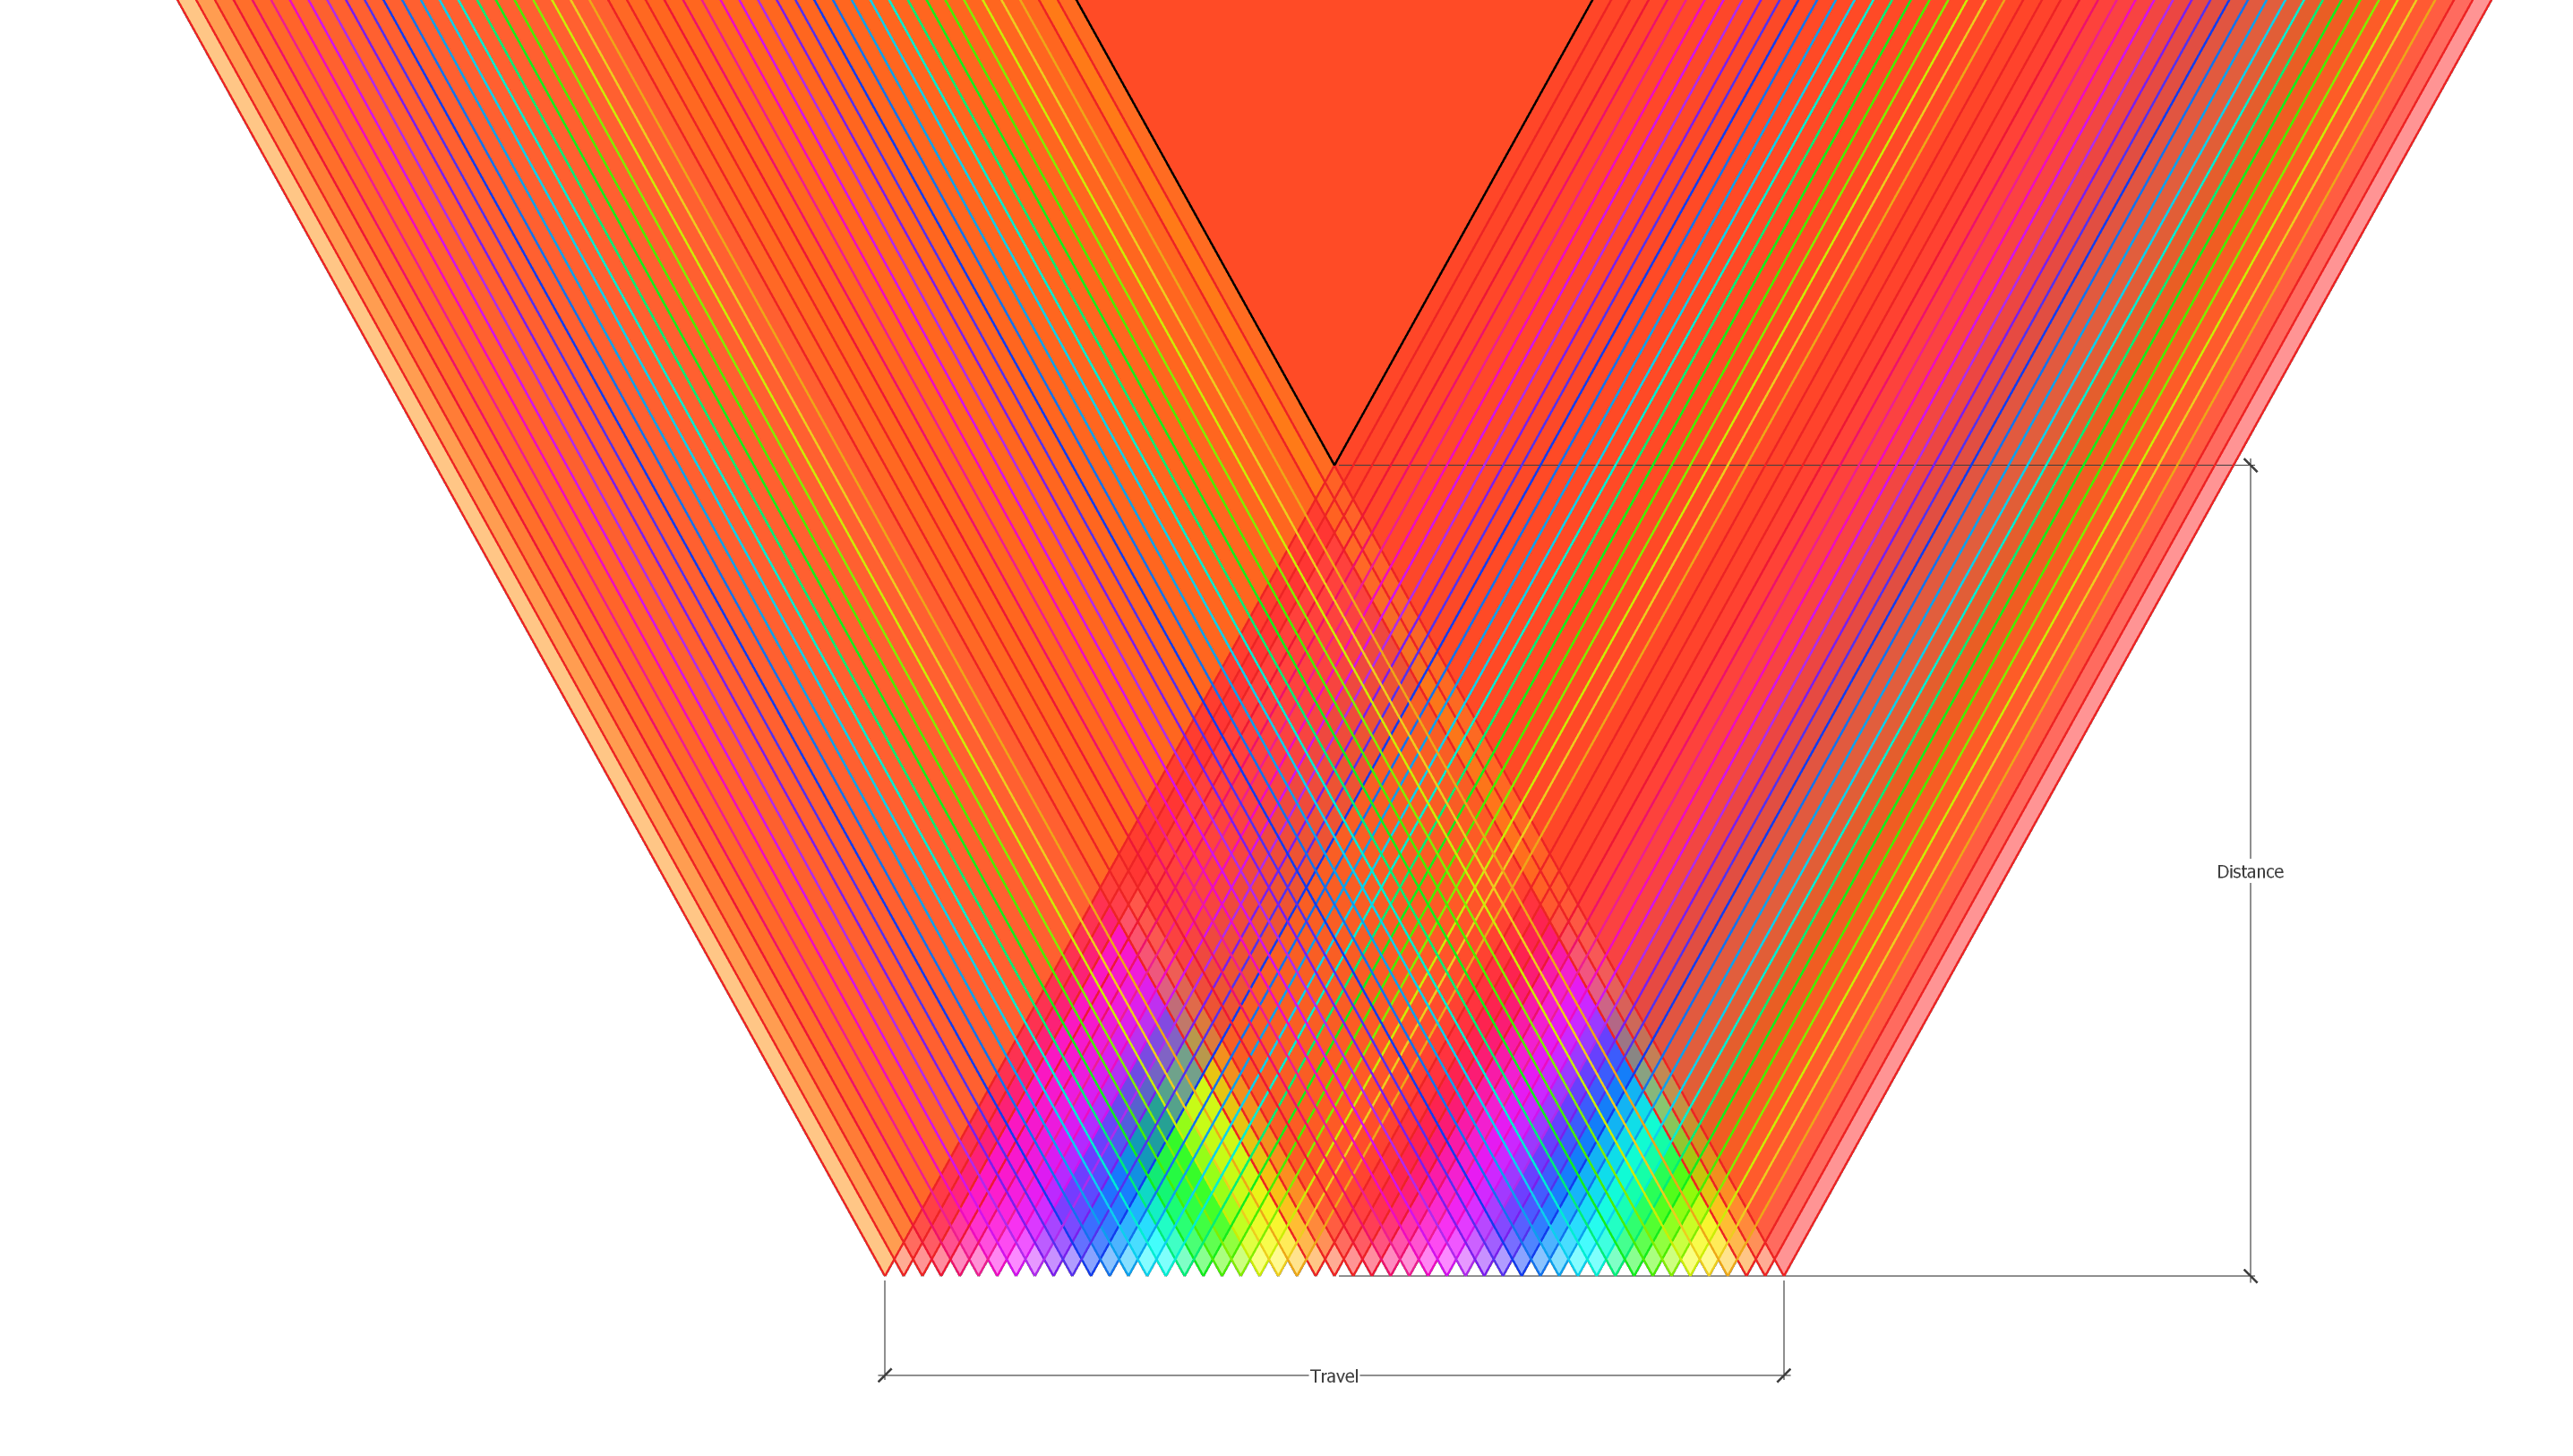
You can see in the image set above that 48 different triangles are overlapped on top of one another. This is representative of the captures you'll make, where each triangle represents 1 view. You can see that while the inner triangles overlap at different points with one another, the only point where all views overlap is still the original triangle, we uncovered in our first steps above.
Subject Size, Camera Distance, and Travel Distance
In general, the closer your subject is to the tip of the triangle, the closer it is to the maximum depth the Looking Glass can provide at maximum focus. This means that in HoloPlay Studio, you'll have to slide the focus slider all the way to the maximum in order to get your object in focus. In practice, this isn't great, since it gives you less freedom overall with the image.
Instead, what you'll want to do is position your subject a bit further away from the inflection point of all these views. This will give you more freedom overall with the values you can set focus to within HoloPlay Studio.
Rules and Mathematics
This formula links the distance of travel to the minimum distance of the camera to the subject. This is dependent on the field of view of your camera. In this example, we're using a camera with a field of view of 58 degrees, or a 39mm lens, for those more photographically inclined.
tan(cameraFOV/2) = (Travel/2)/distance
Whoa, there! That's a bunch of math, what's going on?! Don't worry about this formula too much, it's actually rather simple! In order to determine the distance to the subject, we'll need to plug in our camera's FOV, then this formula will give us the relationship between travel and distance.
Let's say we're using a camera with a 58-degree FOV. In this case, our formula would become:
tan(58/2) = (Travel/2)/distance
tan(29) = (Travel/2)/distance
.55 = (Travel/2)/distance
distance∗.55 = Travel/2
distance∗1.1 = Travel